Tutorial: Upload a Flag Image, Create a Custom Necktie
Turn a state, regional, or even a favorite sports team banner Into a personalized gift
In this step-by-step guide, you’ll learn how to create your own custom flag pattern necktie using our pre-set Zazzle template. All you need is a properly sized image of your flag or banner, and in just a couple of clicks you can upload it to generate a repeating tie design.
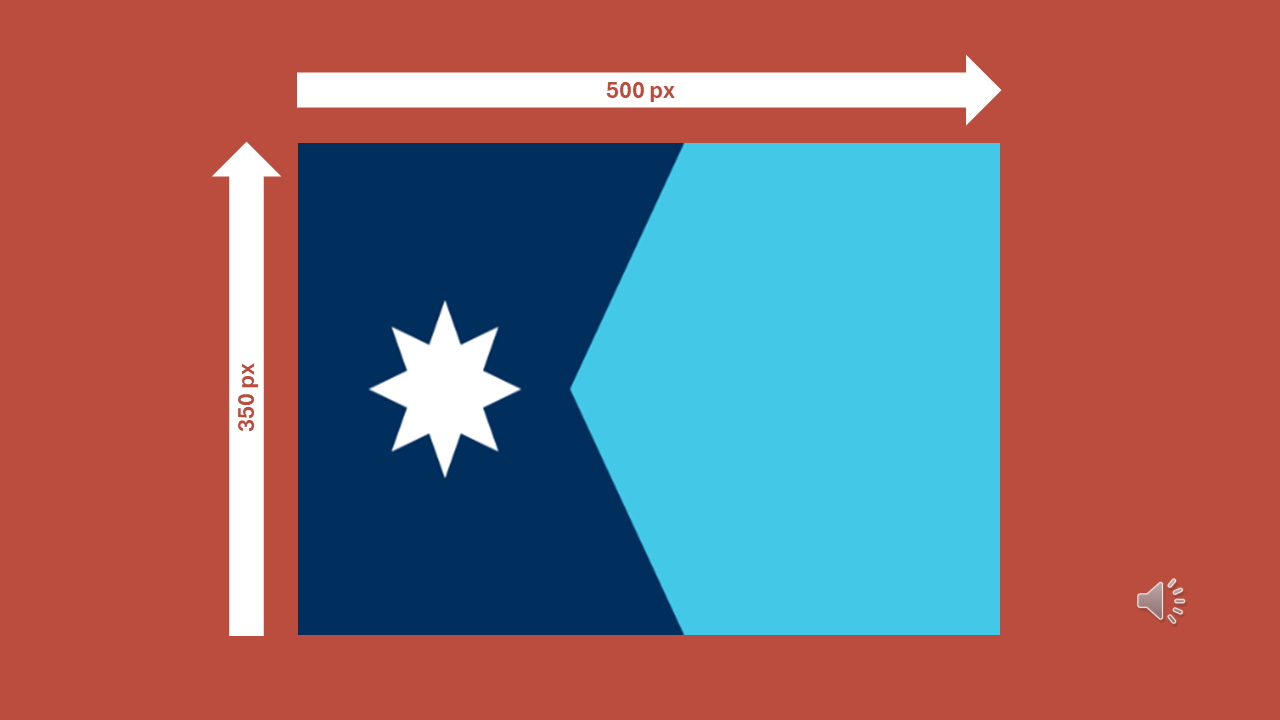
For this example we’ll use Minnesota’s redesigned state flag, but the same steps work with any state, regional, or personal flag. Screenshots below document every action, but the whole process takes only a few minutes.
A downloadable PDF guide is available at the bottom of this page, and you can also explore all Create-A-Pattern neckties here.
Step 1
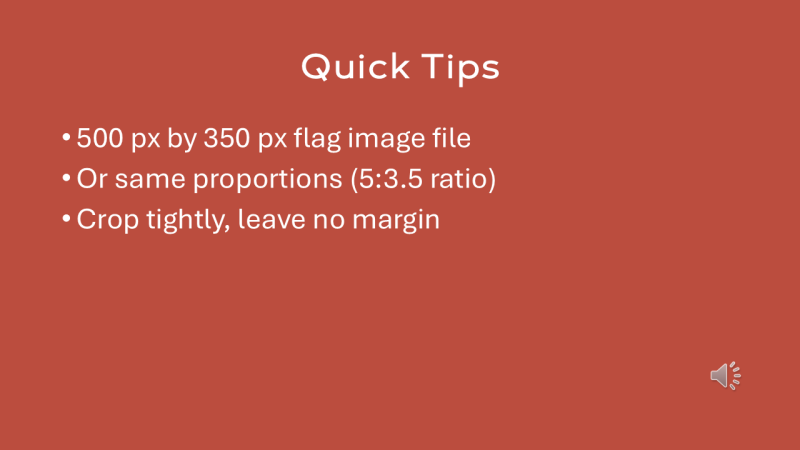
Before uploading, make sure your file is the right size. The ideal dimensions are 500 px wide by 350 px tall—or the same 5:3.5 ratio. Crop tightly with no margins.

Step 2
From the Create-a-Pattern (Flags) necktie product page, click on the Personalize this Design button.
Step 3
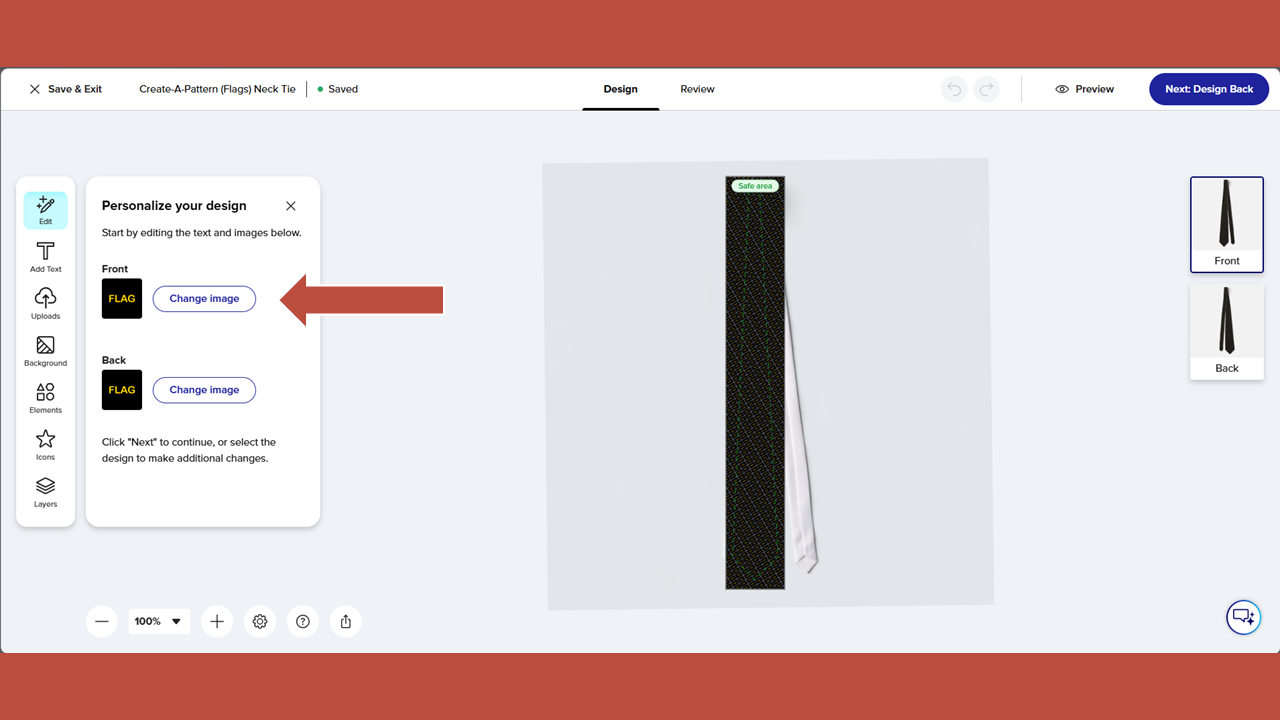
In the Personalize Your Design panel on the left side of the screen, click on the Change Image button.
Step 4
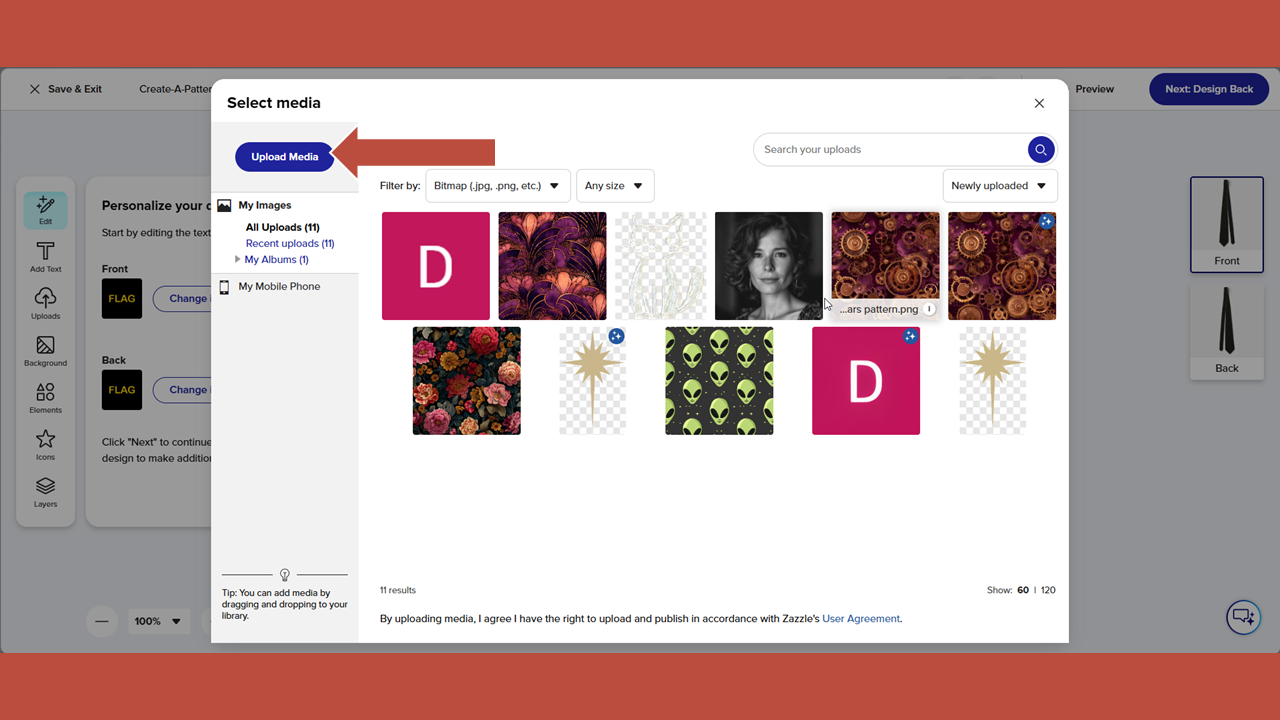
Click Upload Media.

Step 5
Select the flag image file on your computer and upload it.
Step 6
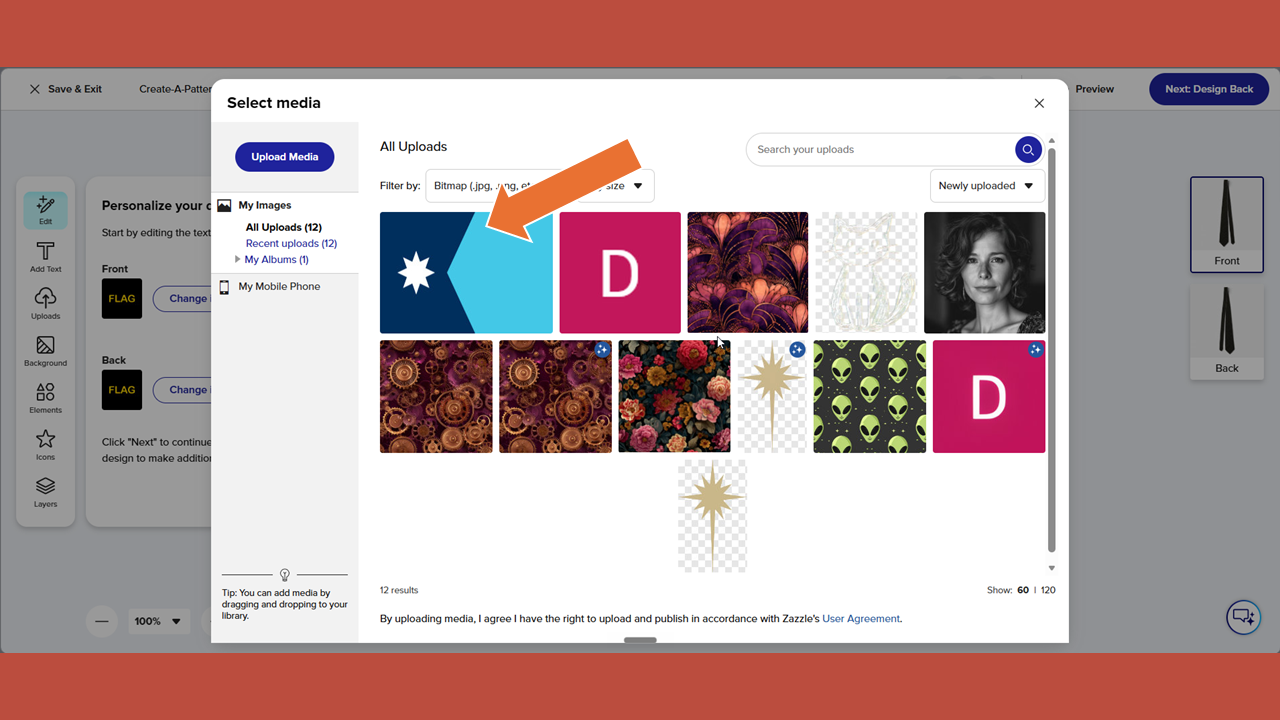
Select the flag image file you just uploaded.

Step 7
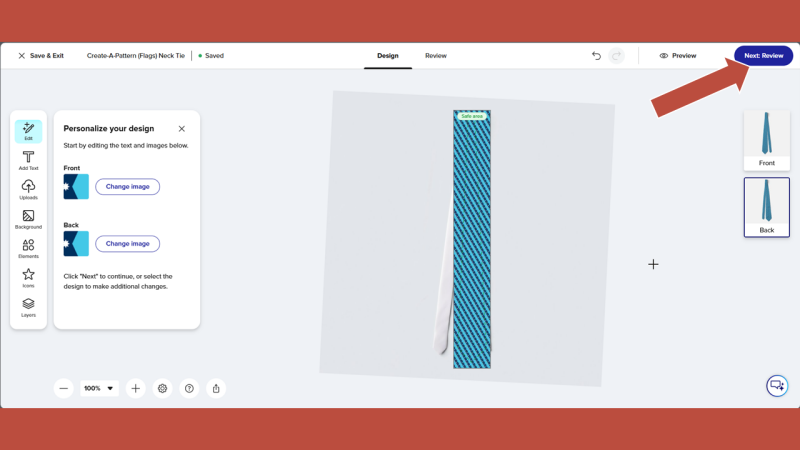
Your flag pattern is automatically created on the necktie. To begin the final review of your necktie, click on the blue button in the upper right-hand corner labeled "Next Design Back".
Step 8
This shows you the design on the back of the necktie. Click the blue button one more time.
Step 9
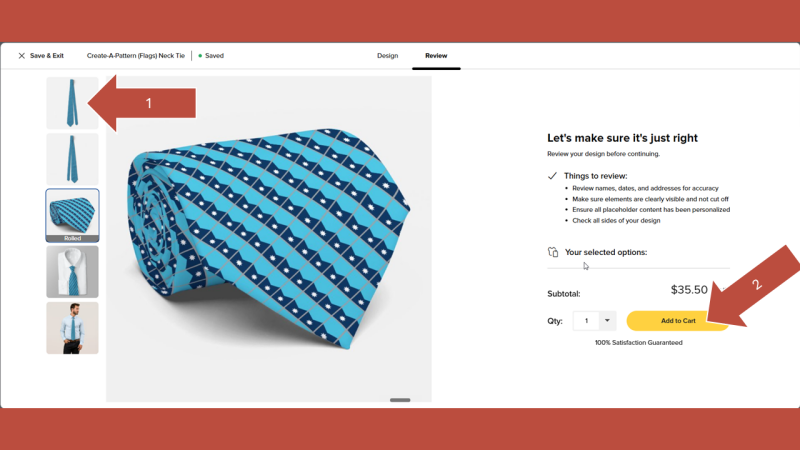
As a final check, click the thumbnails on the right side of the screen to preview your necktie. If you need to address an issue, return to the art board by clicking Design at the top of the screen. If there are no issues, click Add to Cart to begin the purchase process.
Final Tips, Links And Downloads
That’s all it takes to design a custom flag pattern necktie using my template. For best results, upload a flag image sized at 500 x 350 pixels (or the same proportions), cropped tightly without margins.
You can also explore other Create-a-Pattern products that allow you to personalize neckties with your own artwork.
If you'd like a copy of this tutorial offline, Download this PDF:
Pin it