Add a Monogram to a Flag Pattern Necktie
It Takes Just a Few Minutes to Add an Extra Personal Touch
In this step-by-step guide, you’ll learn how to add a monogram to your flag necktie using Zazzle’s online designer. The example uses the Albania flag tie, but the same steps work for any of the 200 designs in our collection. This tutorial includes screenshots documenting each action and click, but the process only takes a few minutes. A downloadable PDF guide is available at the bottom of this page, and you can also browse the full directory at MyTies.net.

Step 1
From the Albania necktie product page in Zazzle, click on EDIT THIS DESIGN.

Step 2
Click on LAYERS to open the left-hand panel. Select tile in the Layers panel. The selection will show on the artboard as well.

Step 3
Select Alignment in the context menu at the top of the screen. Now find the Rotate option in the panel on the left side of the screen. Click the Rotate Clockwise button several times until you get to 45 degrees. This will rotate the pattern tile on the artboard.

Step 4
- Click Elements in the Toolbox then select the square in the Panel. This will place a very large square on top of the Artboard.
- To reduce the size of the square, click on the minus symbol in the context menu at the top of the screen. Click it several times to reduce the size of the box until it is approximately the same size as the pattern tile.
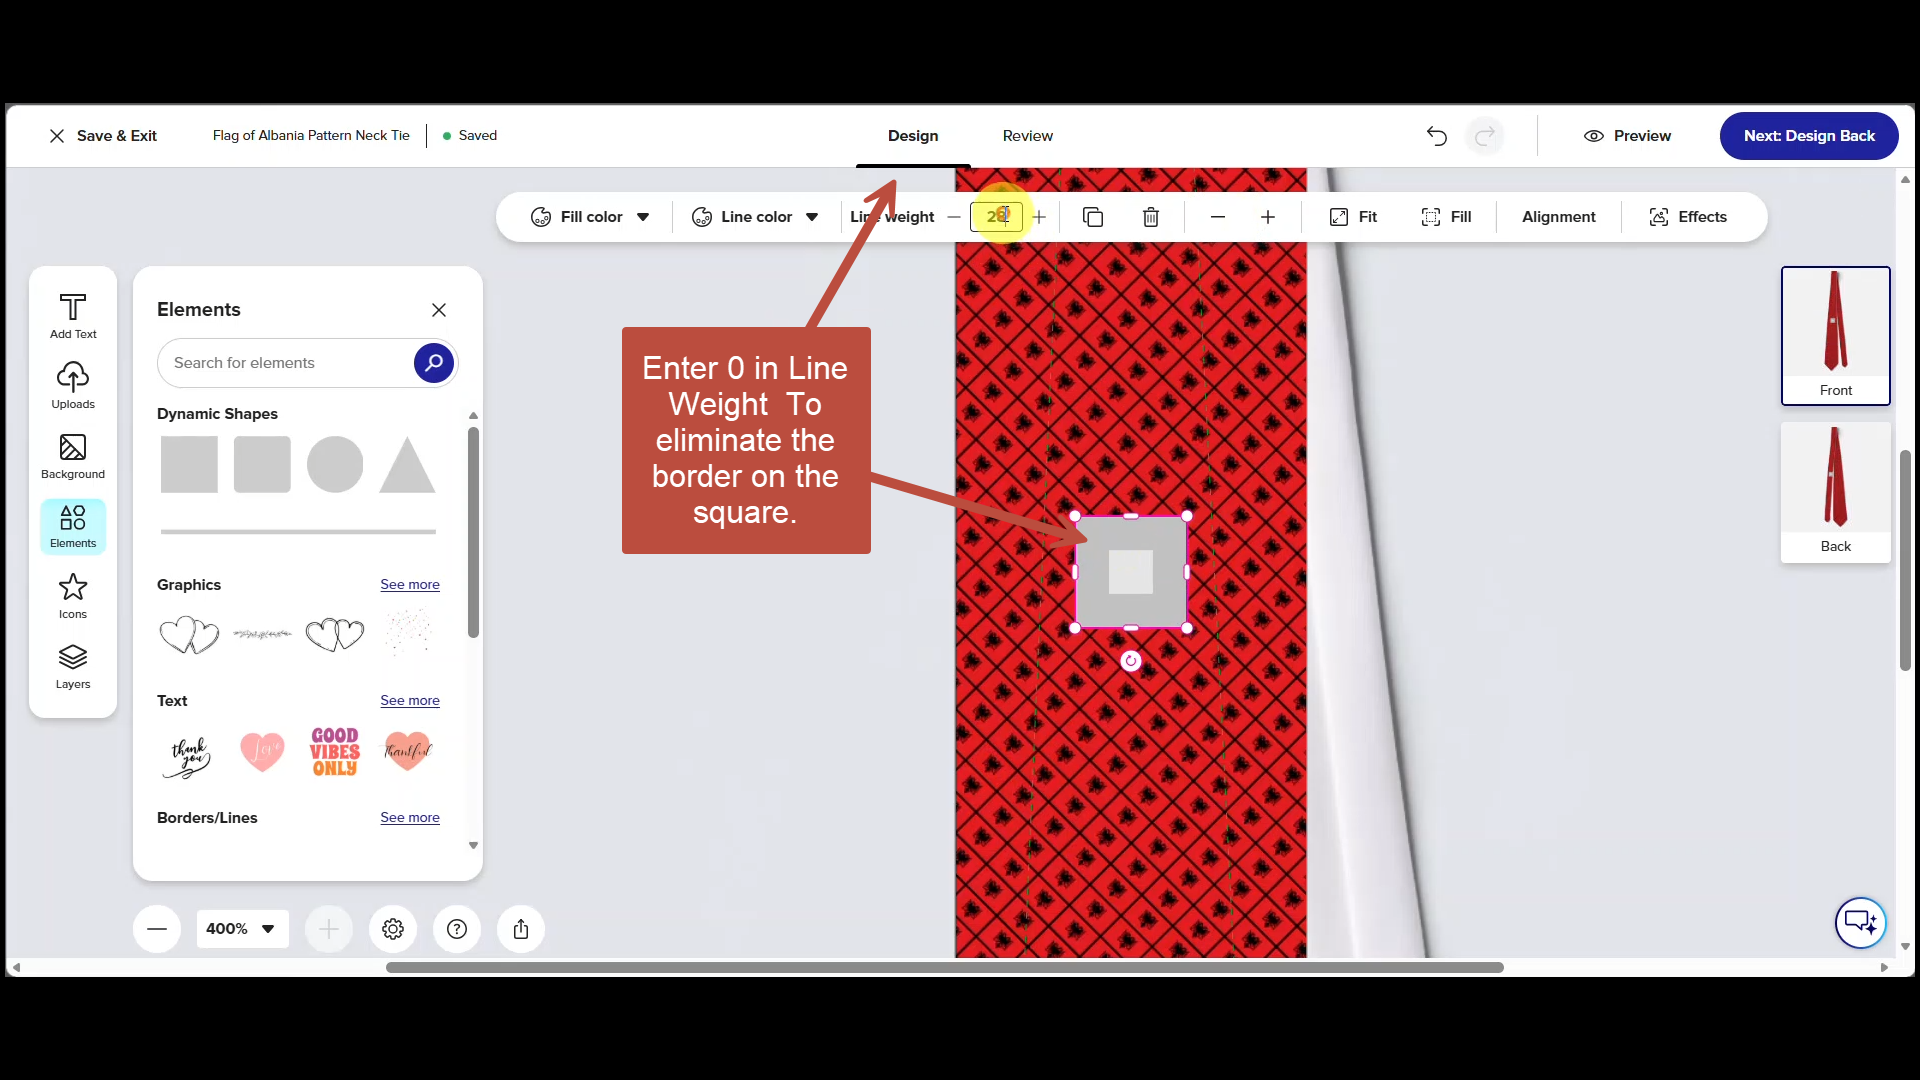
Step 5
In the context menu at the top of the screen enter 0 in the line weight field. This will eliminate the line on the outside of the square.
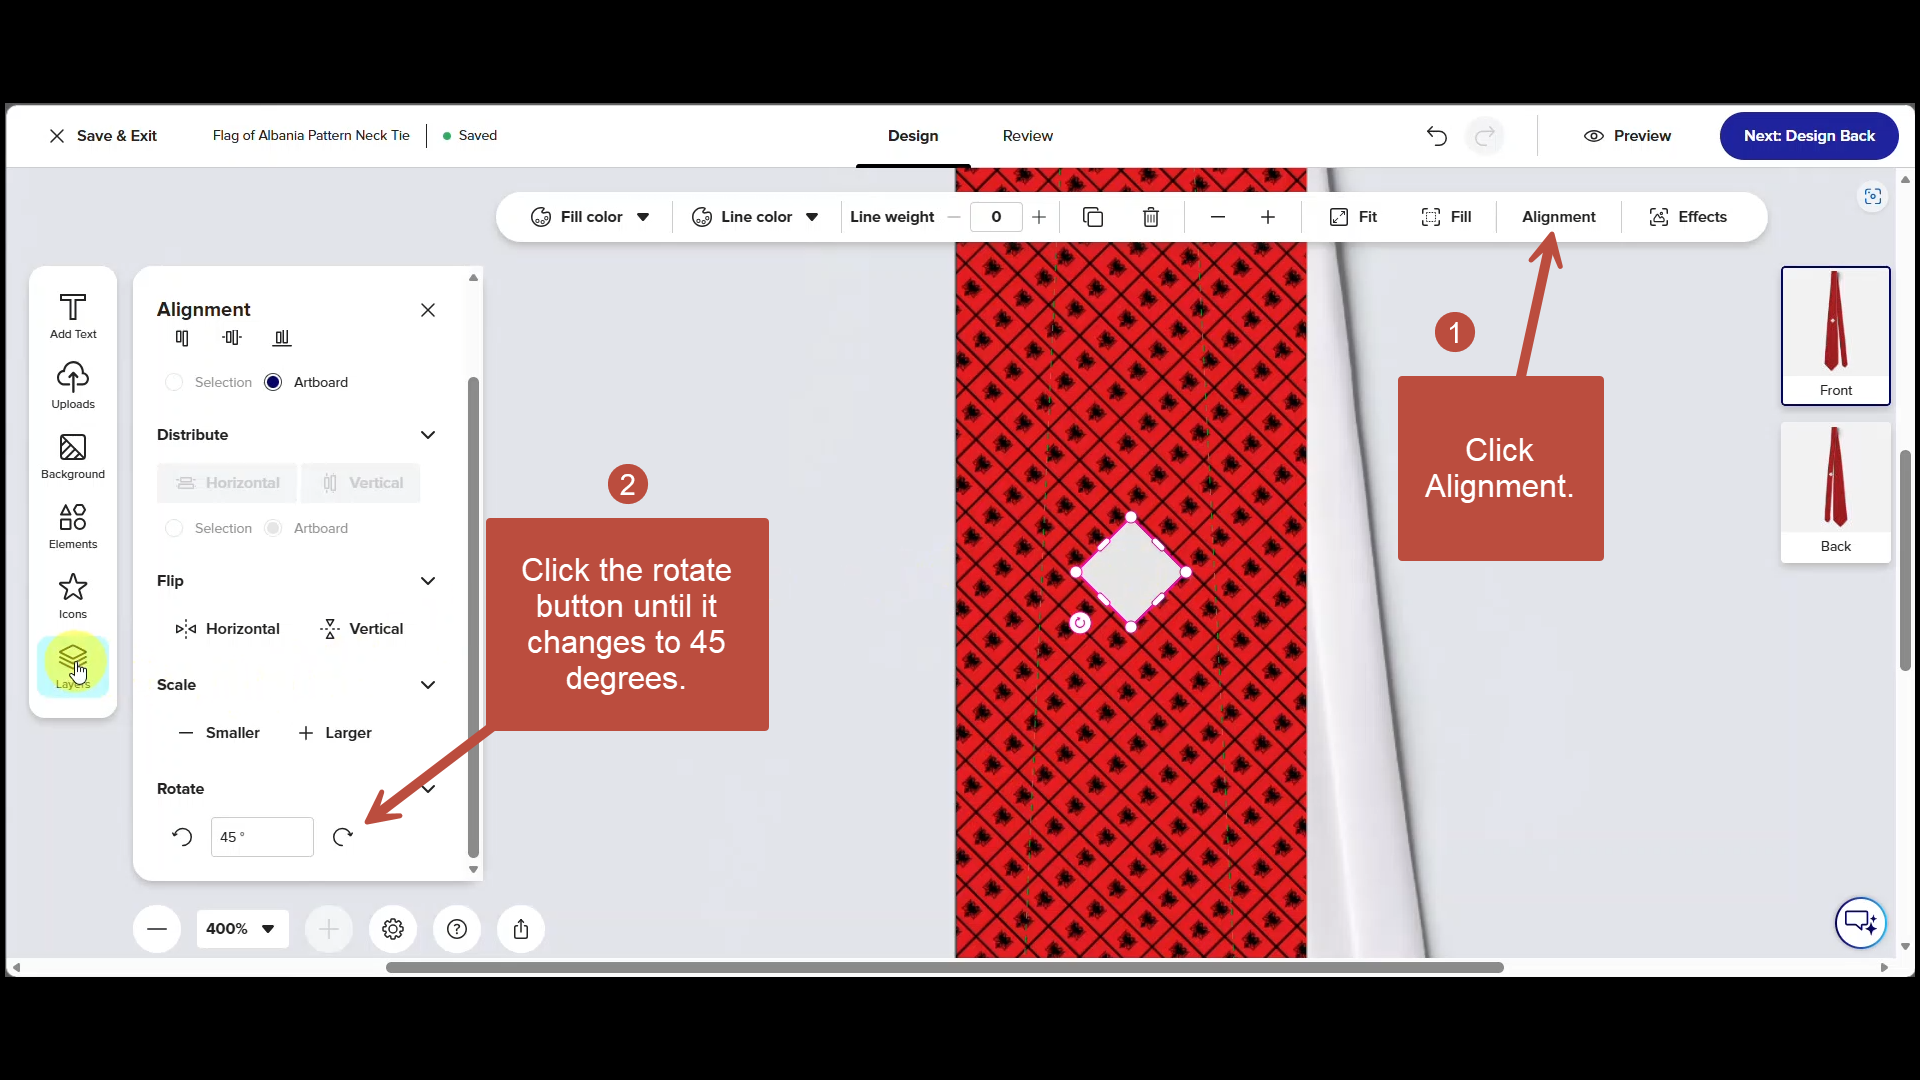
Step 6
1. Click Alignment.
2. Next, click the rotate button until it changes to 45 degrees. This will rotate the square into a diamond and match the angle of the pattern.
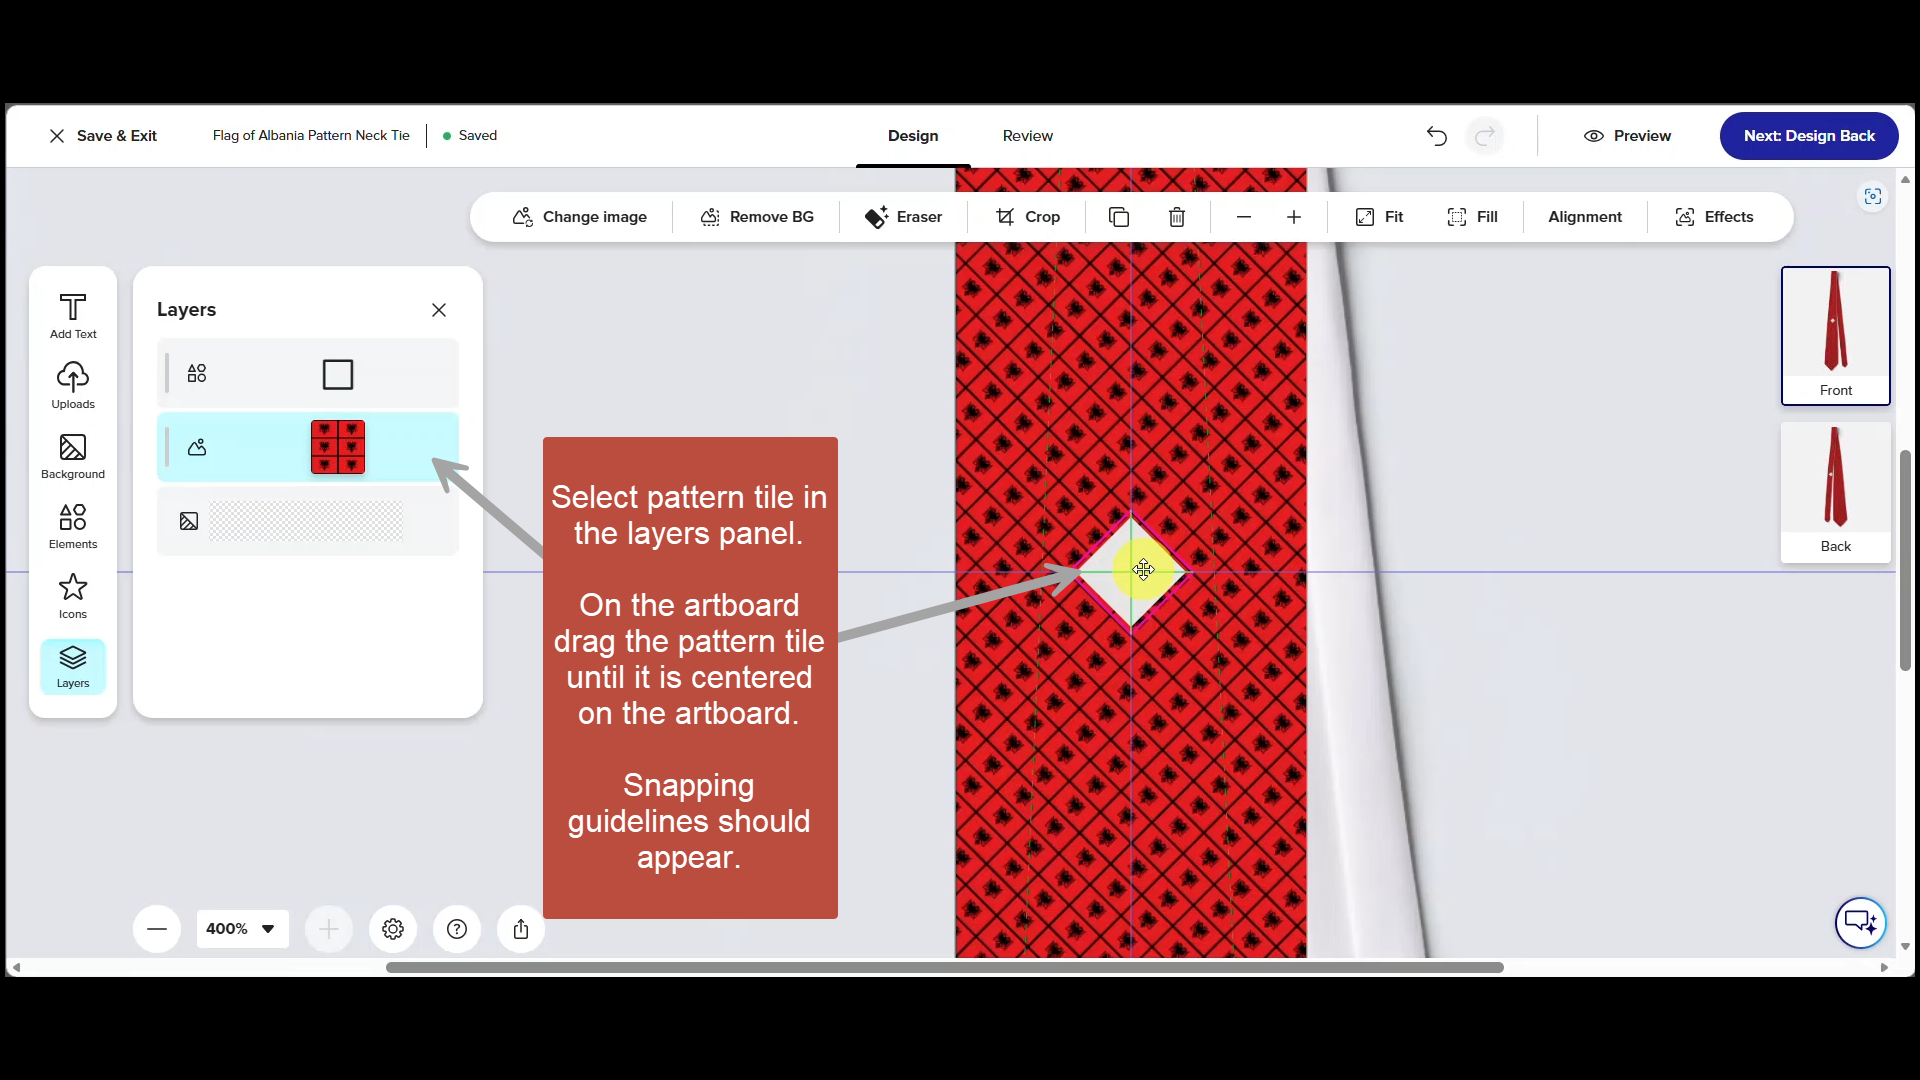
Step 7
- Click on layers in the toolbox.
- In the Layers panel select the Pattern Tile.
- Now on the Artboard drag the pattern tile until it is centered on the artboard. Snapping guides should appear as you approach the center.
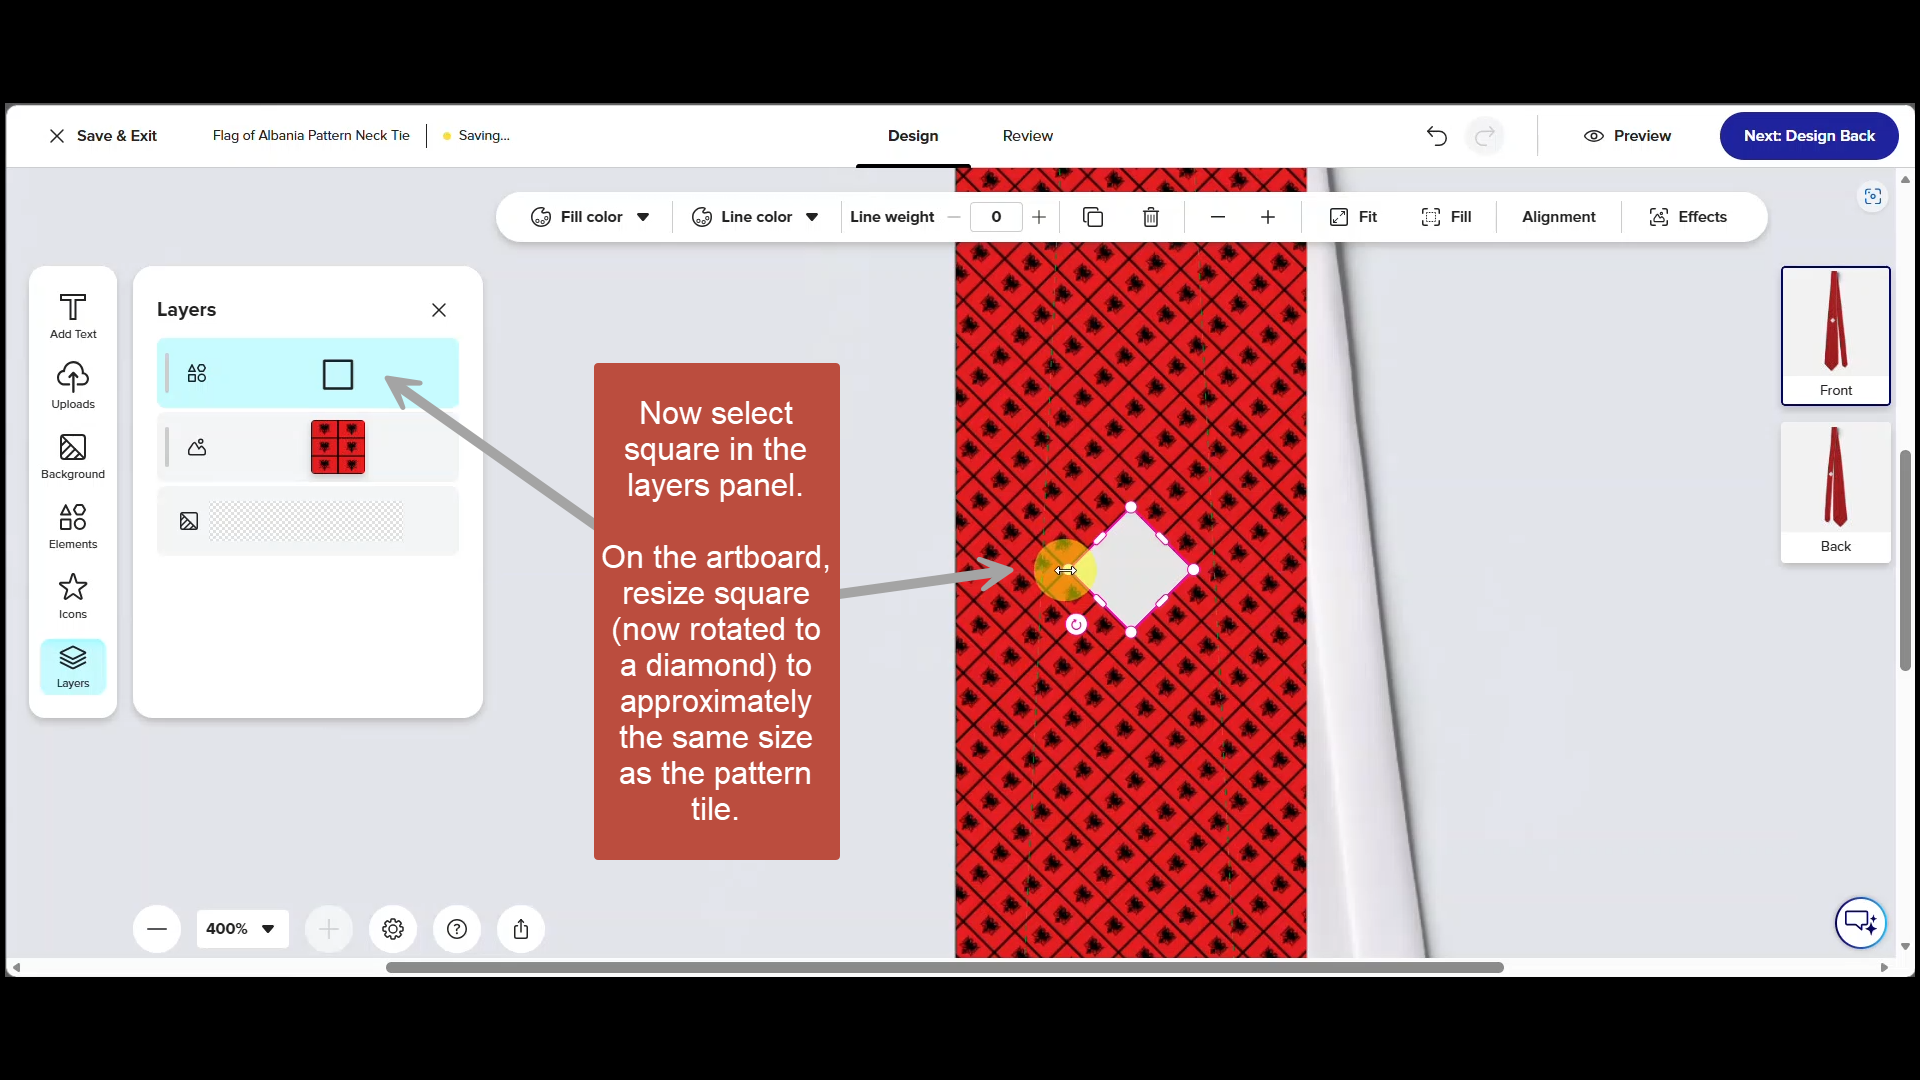
Step 8
Select the square in the Layers Panel. On the artboard, resize the square, which is now rotated into a diamond, by using the handles at its corners. Resize the diamond to approximately the same size as the pattern tile.
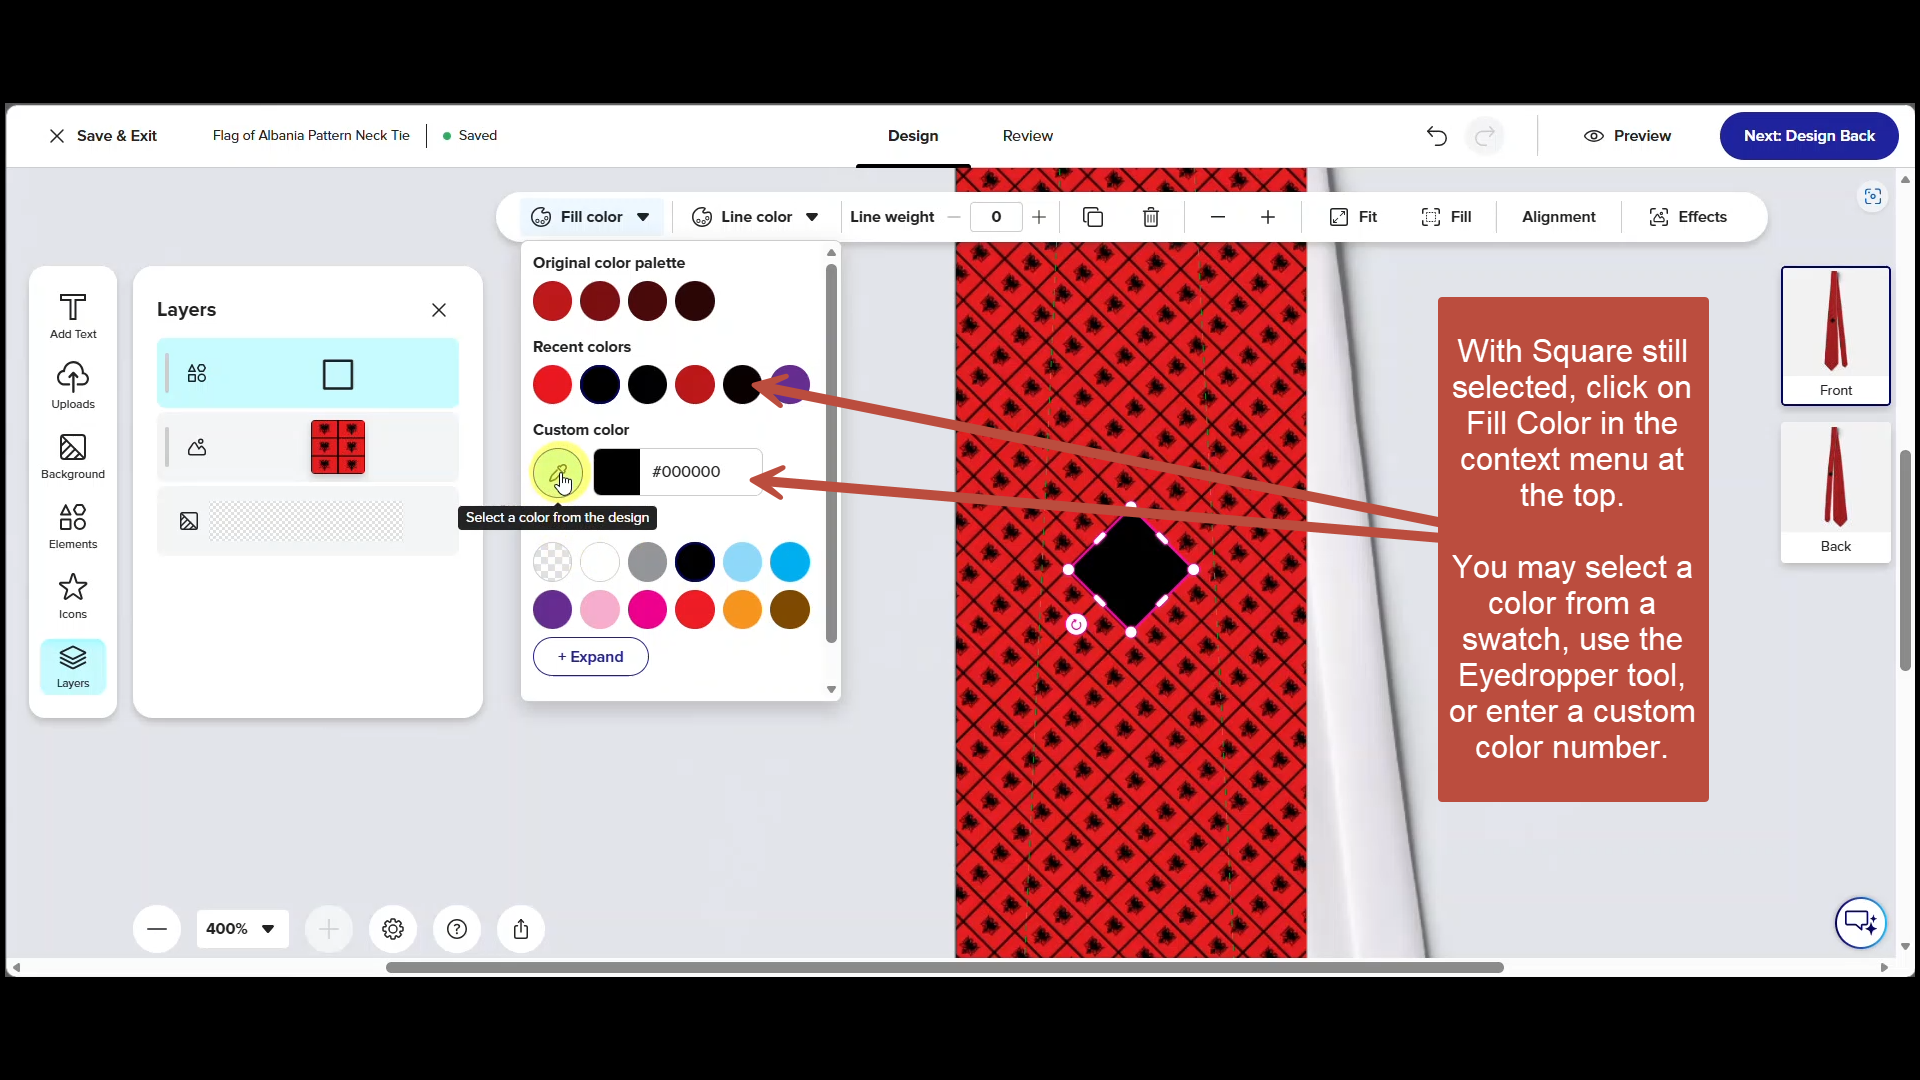
Step 9
With the square still selected, click on Fill Color in the context menu at the top. For this necktie we can select black from one of the existing swatches; however you can also use the eyedropper tool to select a color from the flag or enter a custom color number.
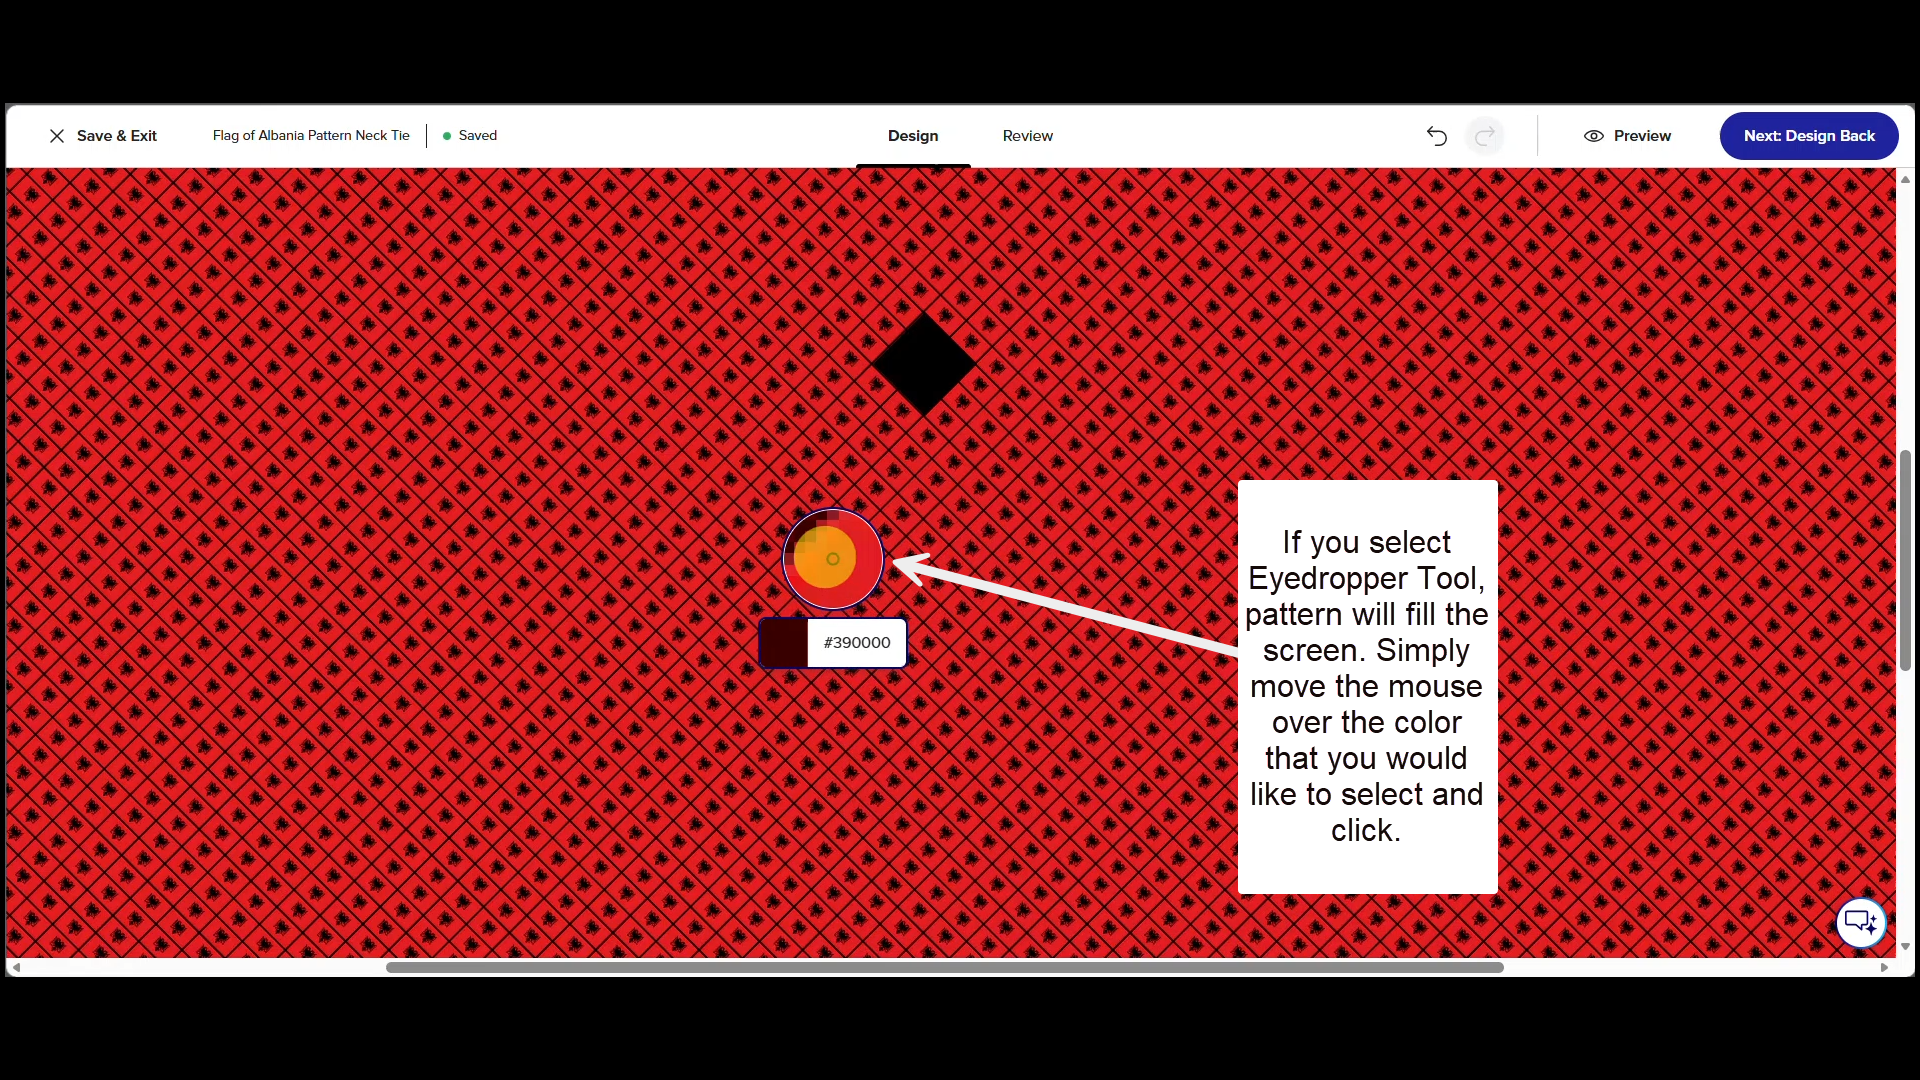
Step 10
When you use the Eyedropper tool, the pattern will fill the screen. Simply move the mouse over the color that you would like to select and click. The selected item on the art board will be filled with the color that you select.
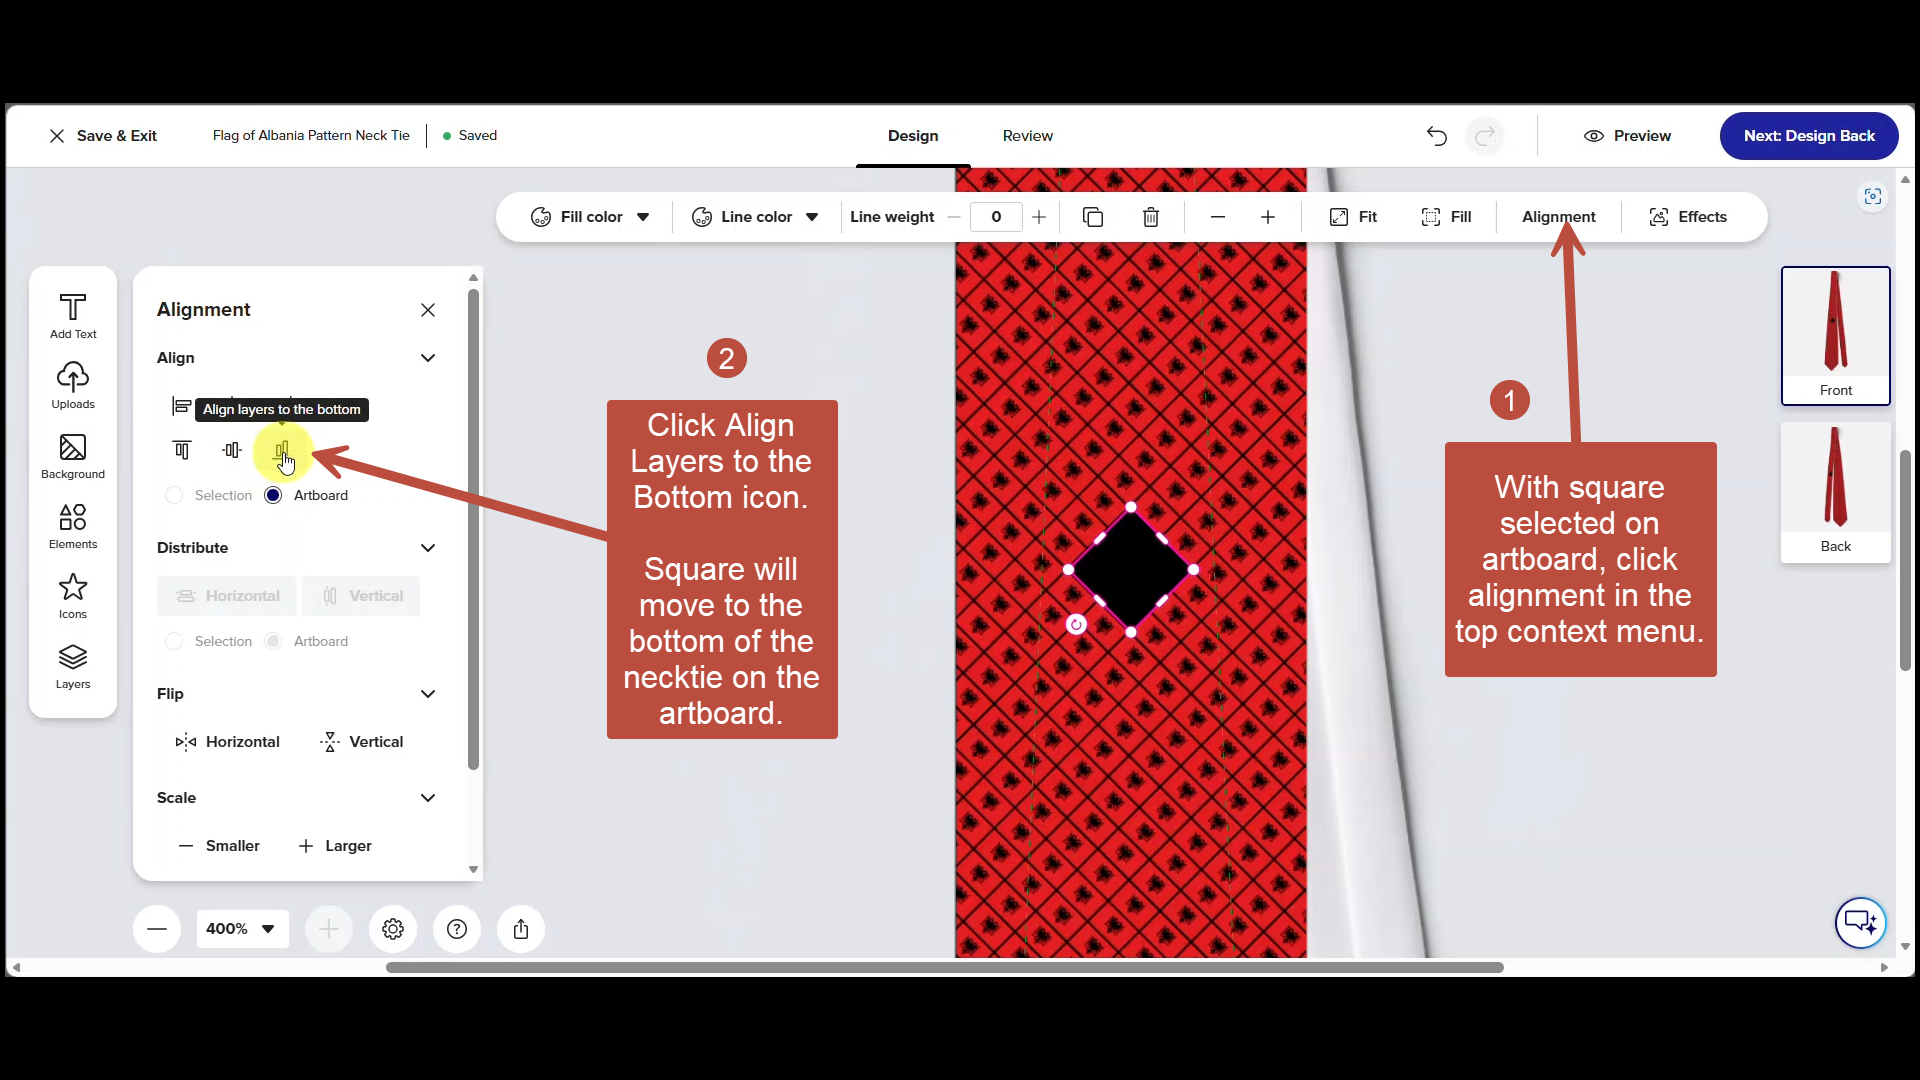
Step 11
- Click Alignment in the context menu at the top.
- Choose Align Layers to the Bottom icon n the panel to the left.
The square will move to the bottom of the necktie on the artboard. You may also click and drag the square to the bottom but it's quicker just to use the alignment tool.
Step 12
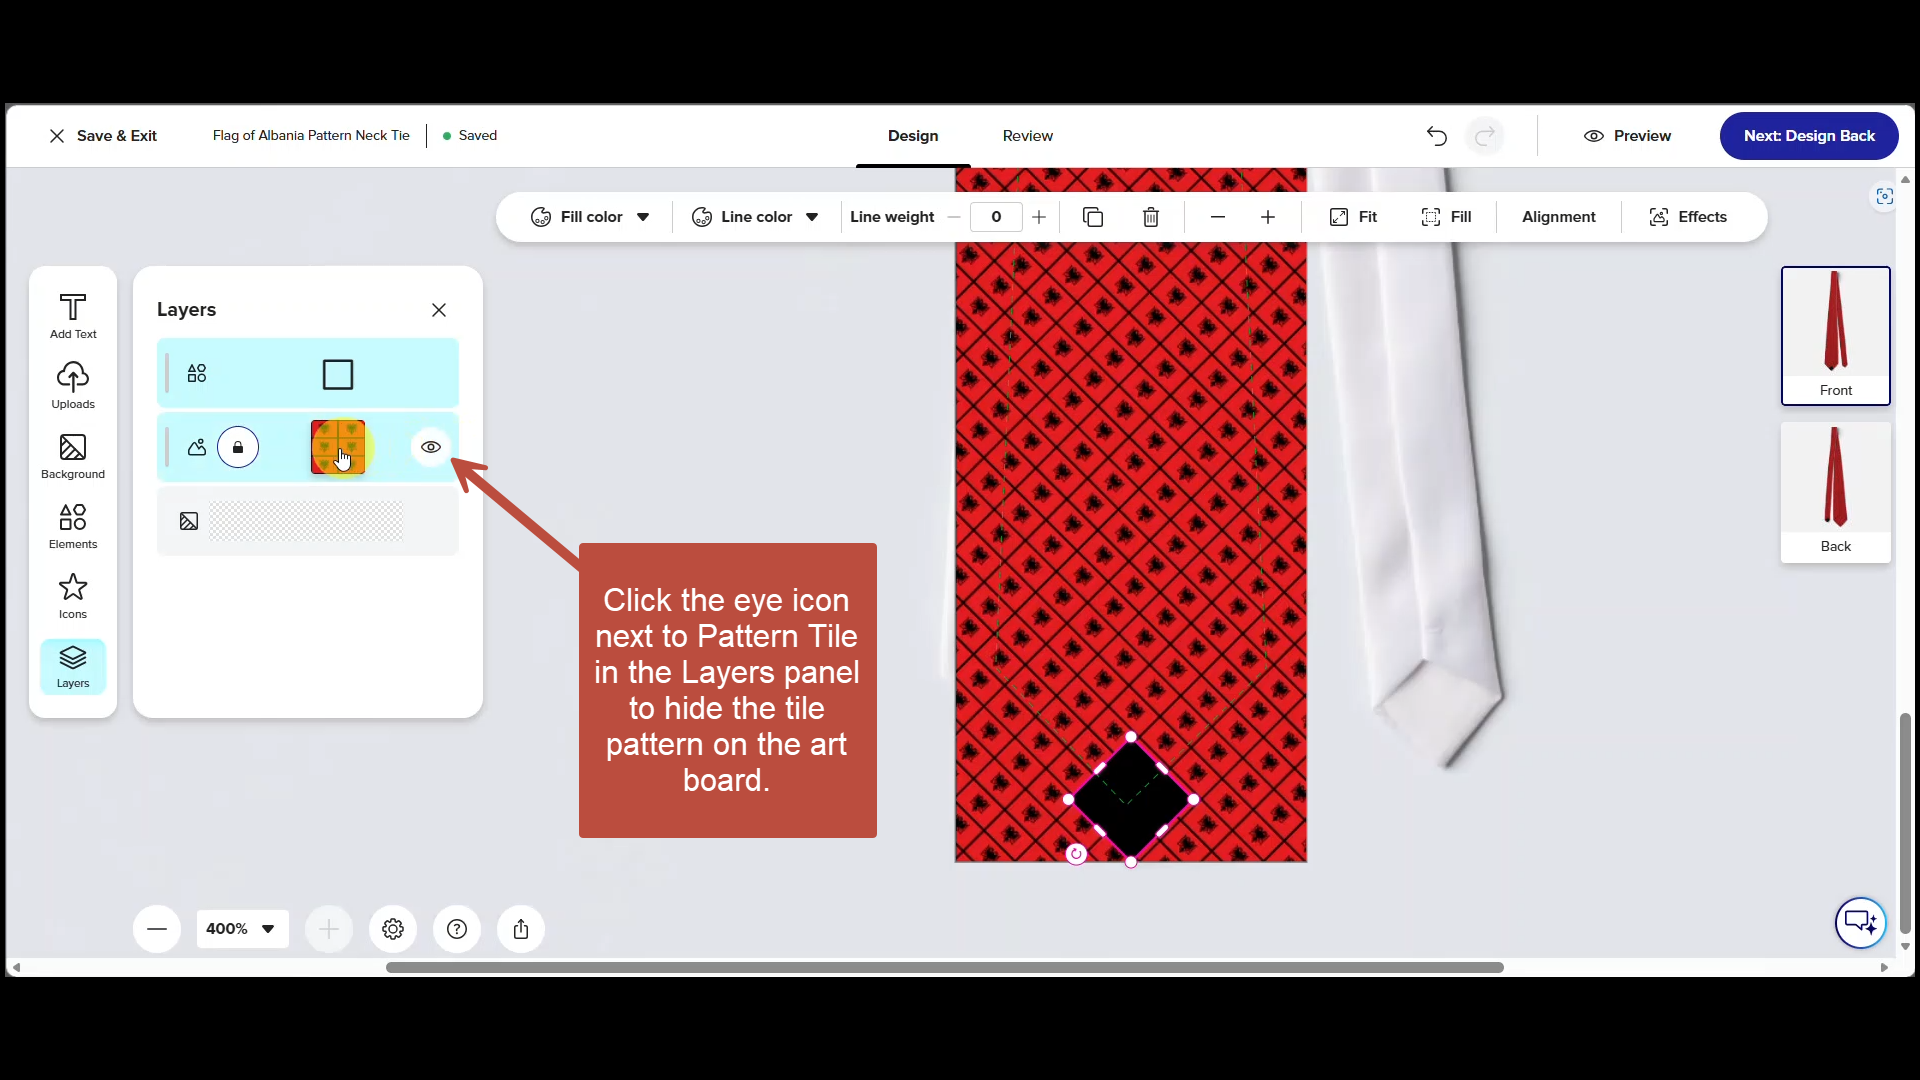
Click the eye icon next to the pattern tile in the layers panel to hide the tile pattern on the art board.
Step 13
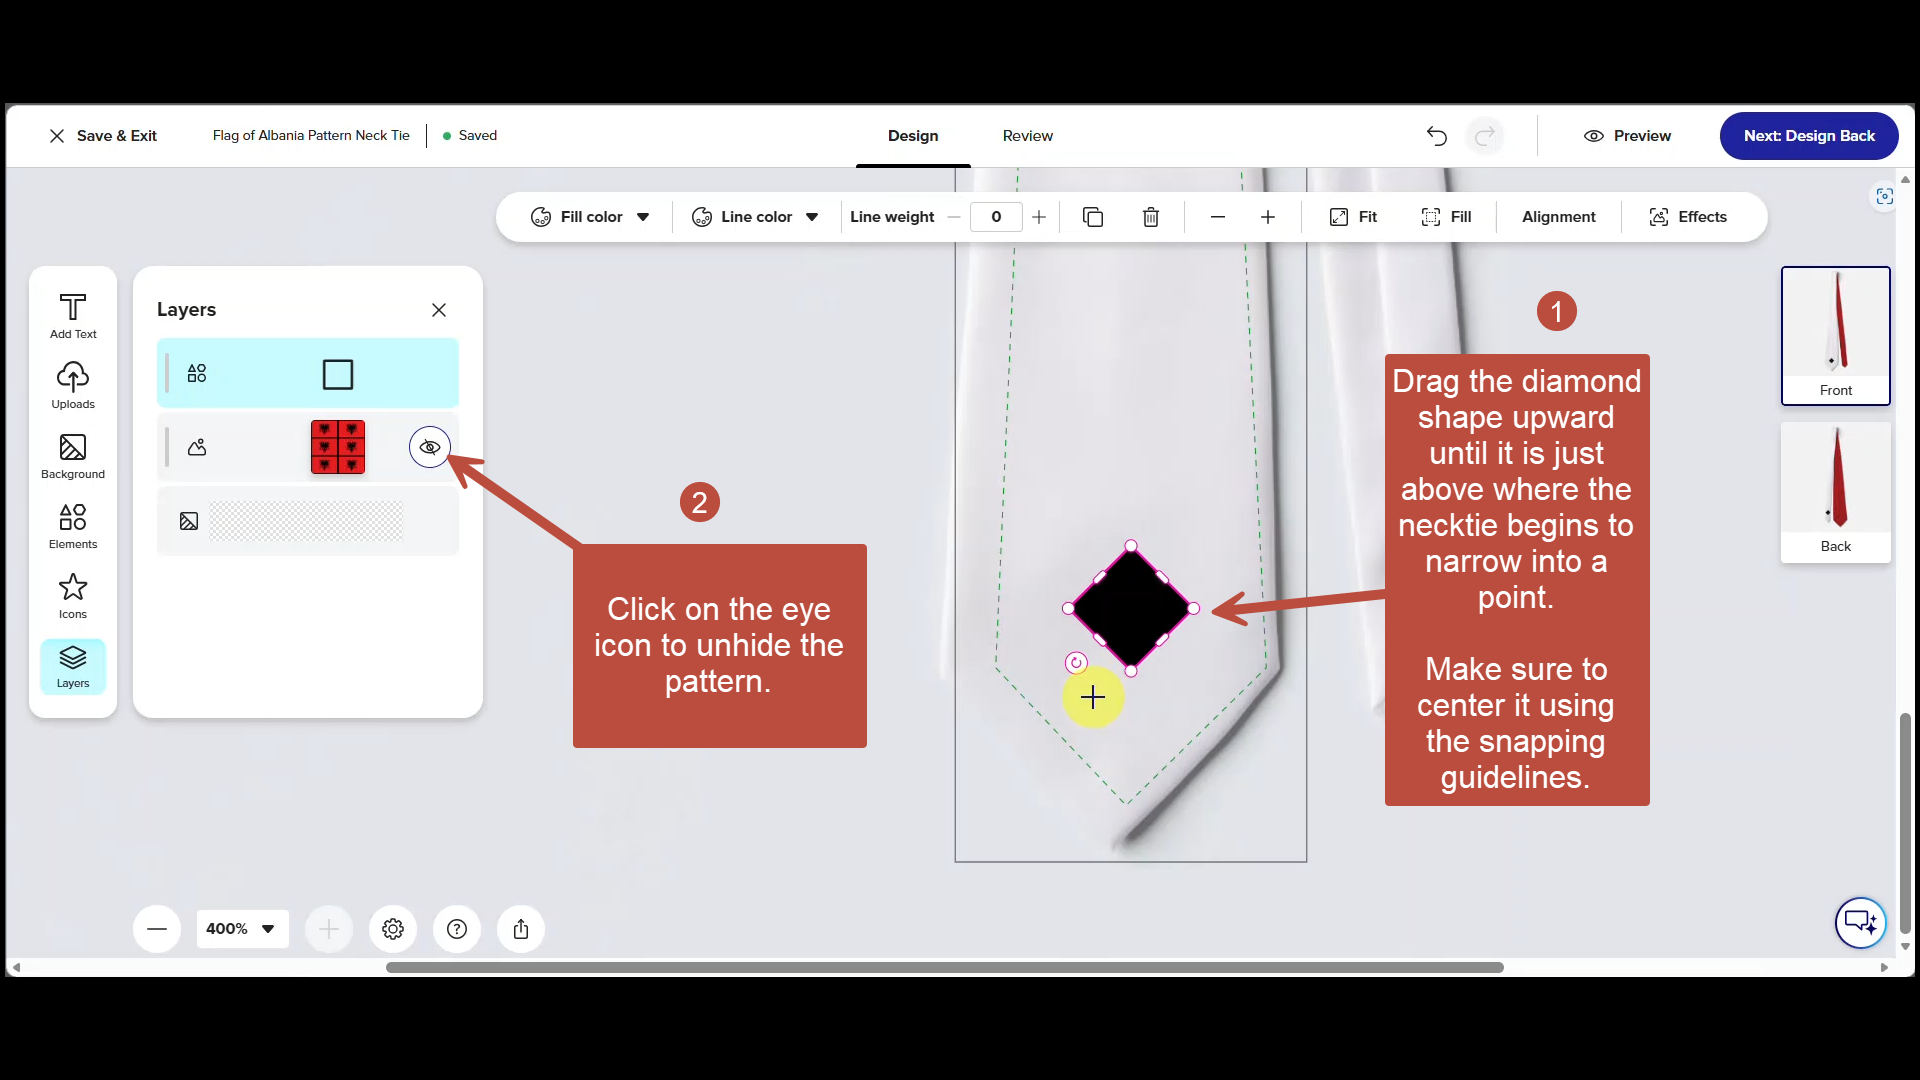
- Drag the diamond shape upward until it is just above where the necktie begins to narrow into a point. Make sure to center it using the snapping guidelines.
- Click on the i icon to unhide the pattern.
Step 14
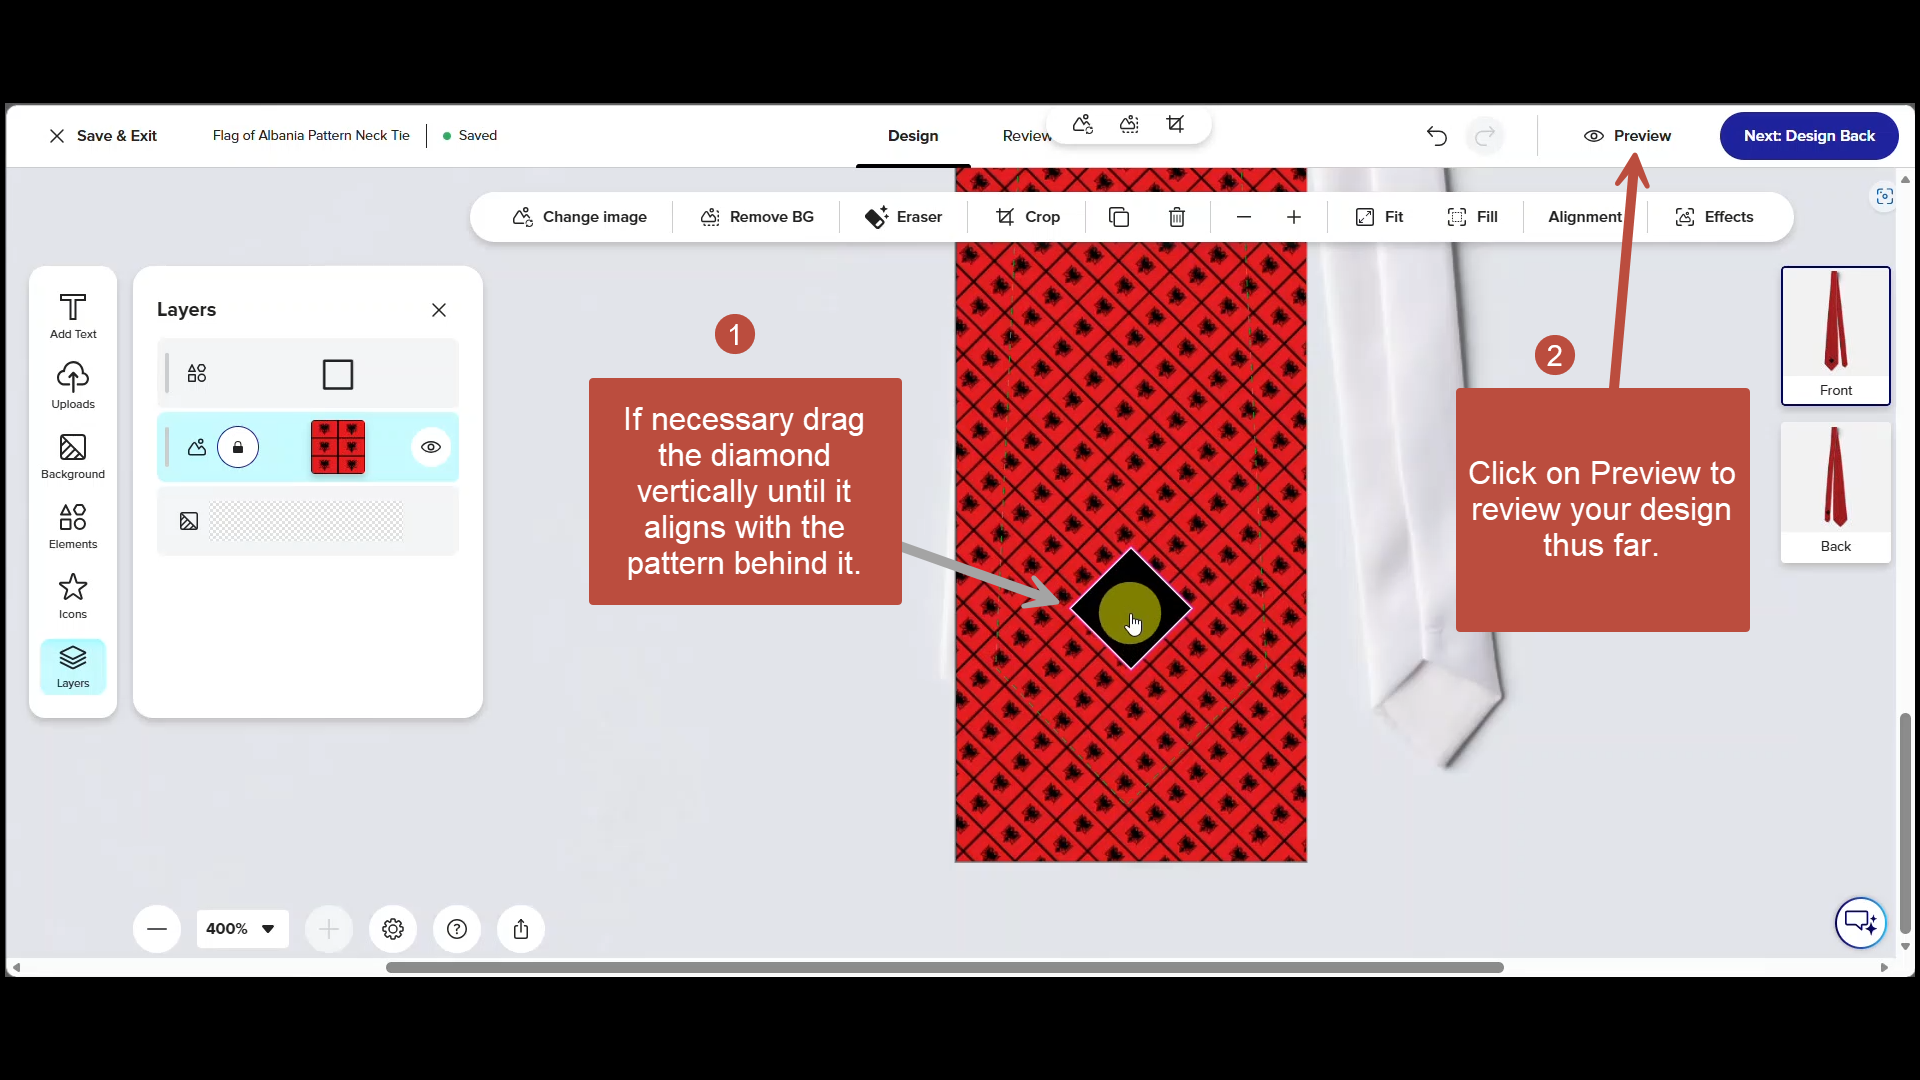
- Adjust the position of the diamond to align within the pattern if necessary.
- Click on Preview to review your design thus far.
Step 15
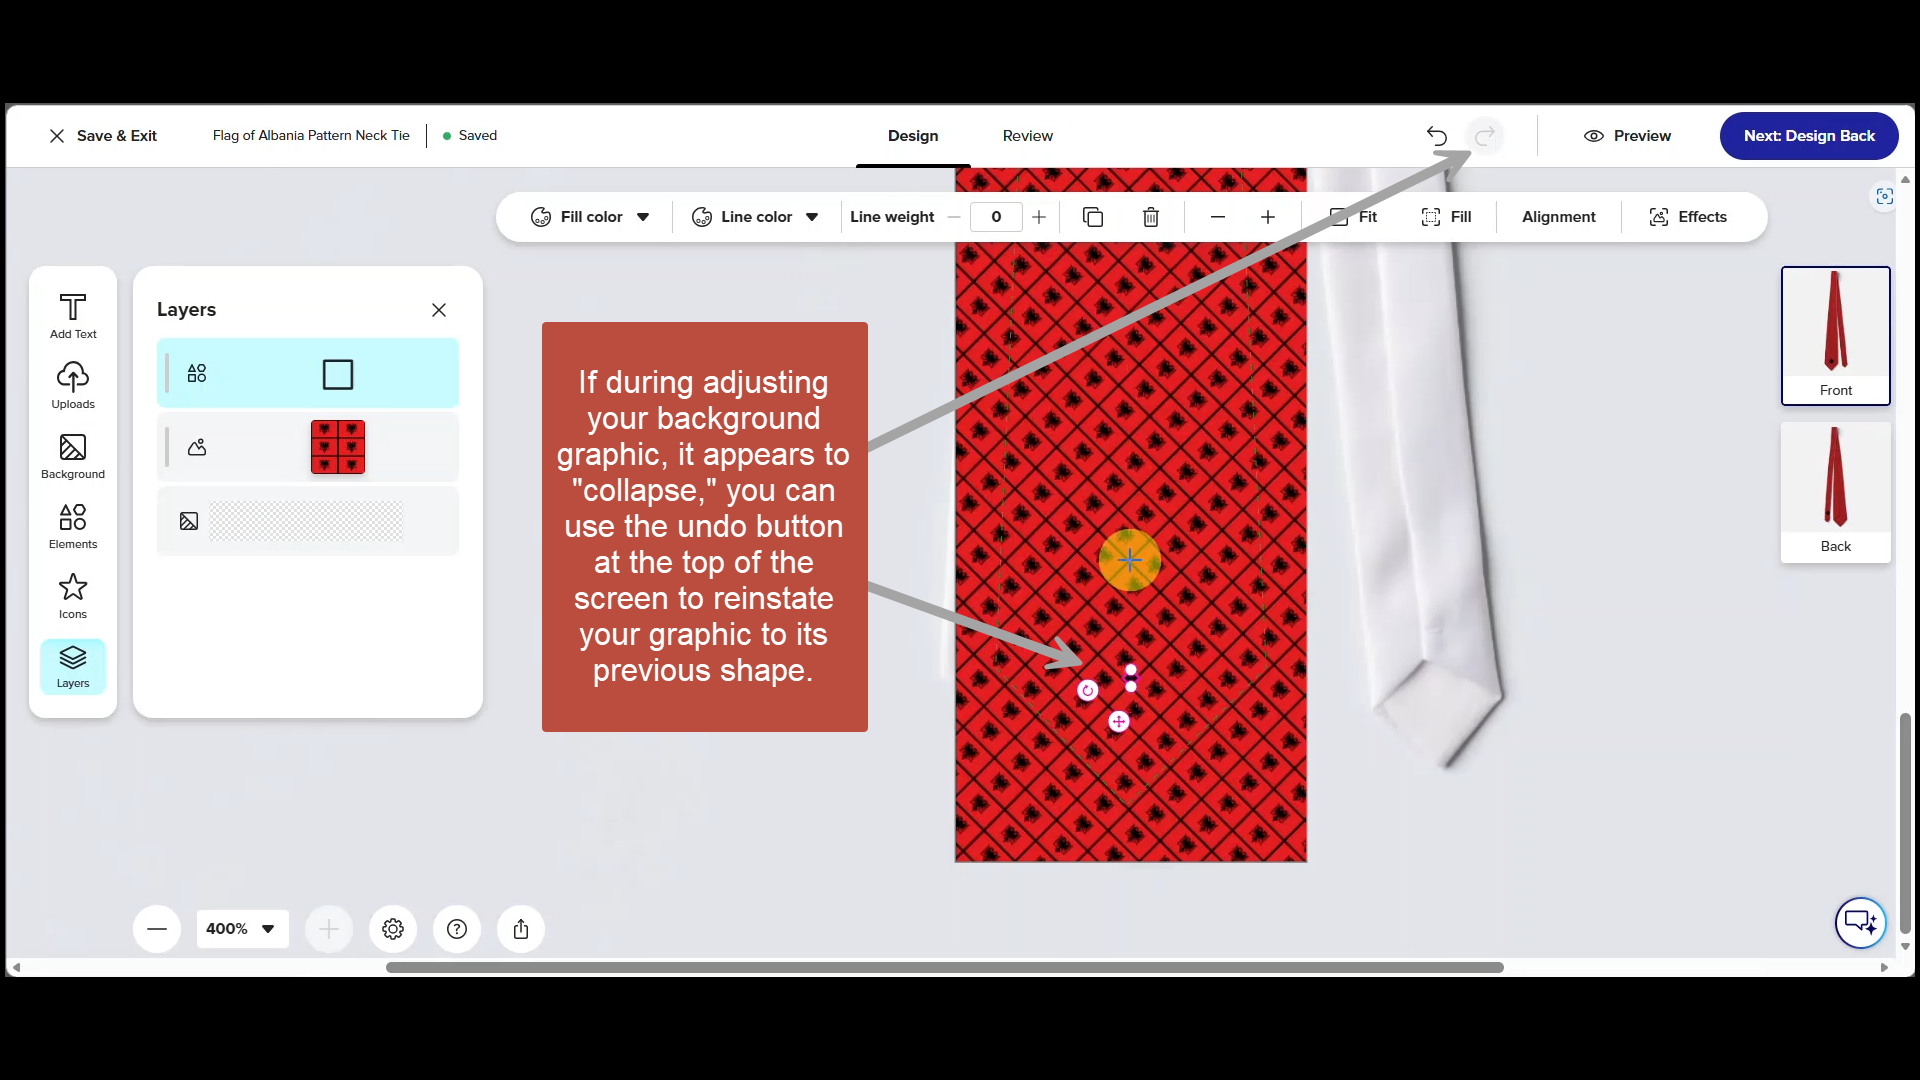
If the diamond appears to collapse in on itself while you are adjusting it, use the Undo button at the top of the screen to reinstate your graphic to its previous shape. I'm not sure what causes the issue but whenever you encounter something unusual or unexpected, use the Undo button at the top.
Step 16
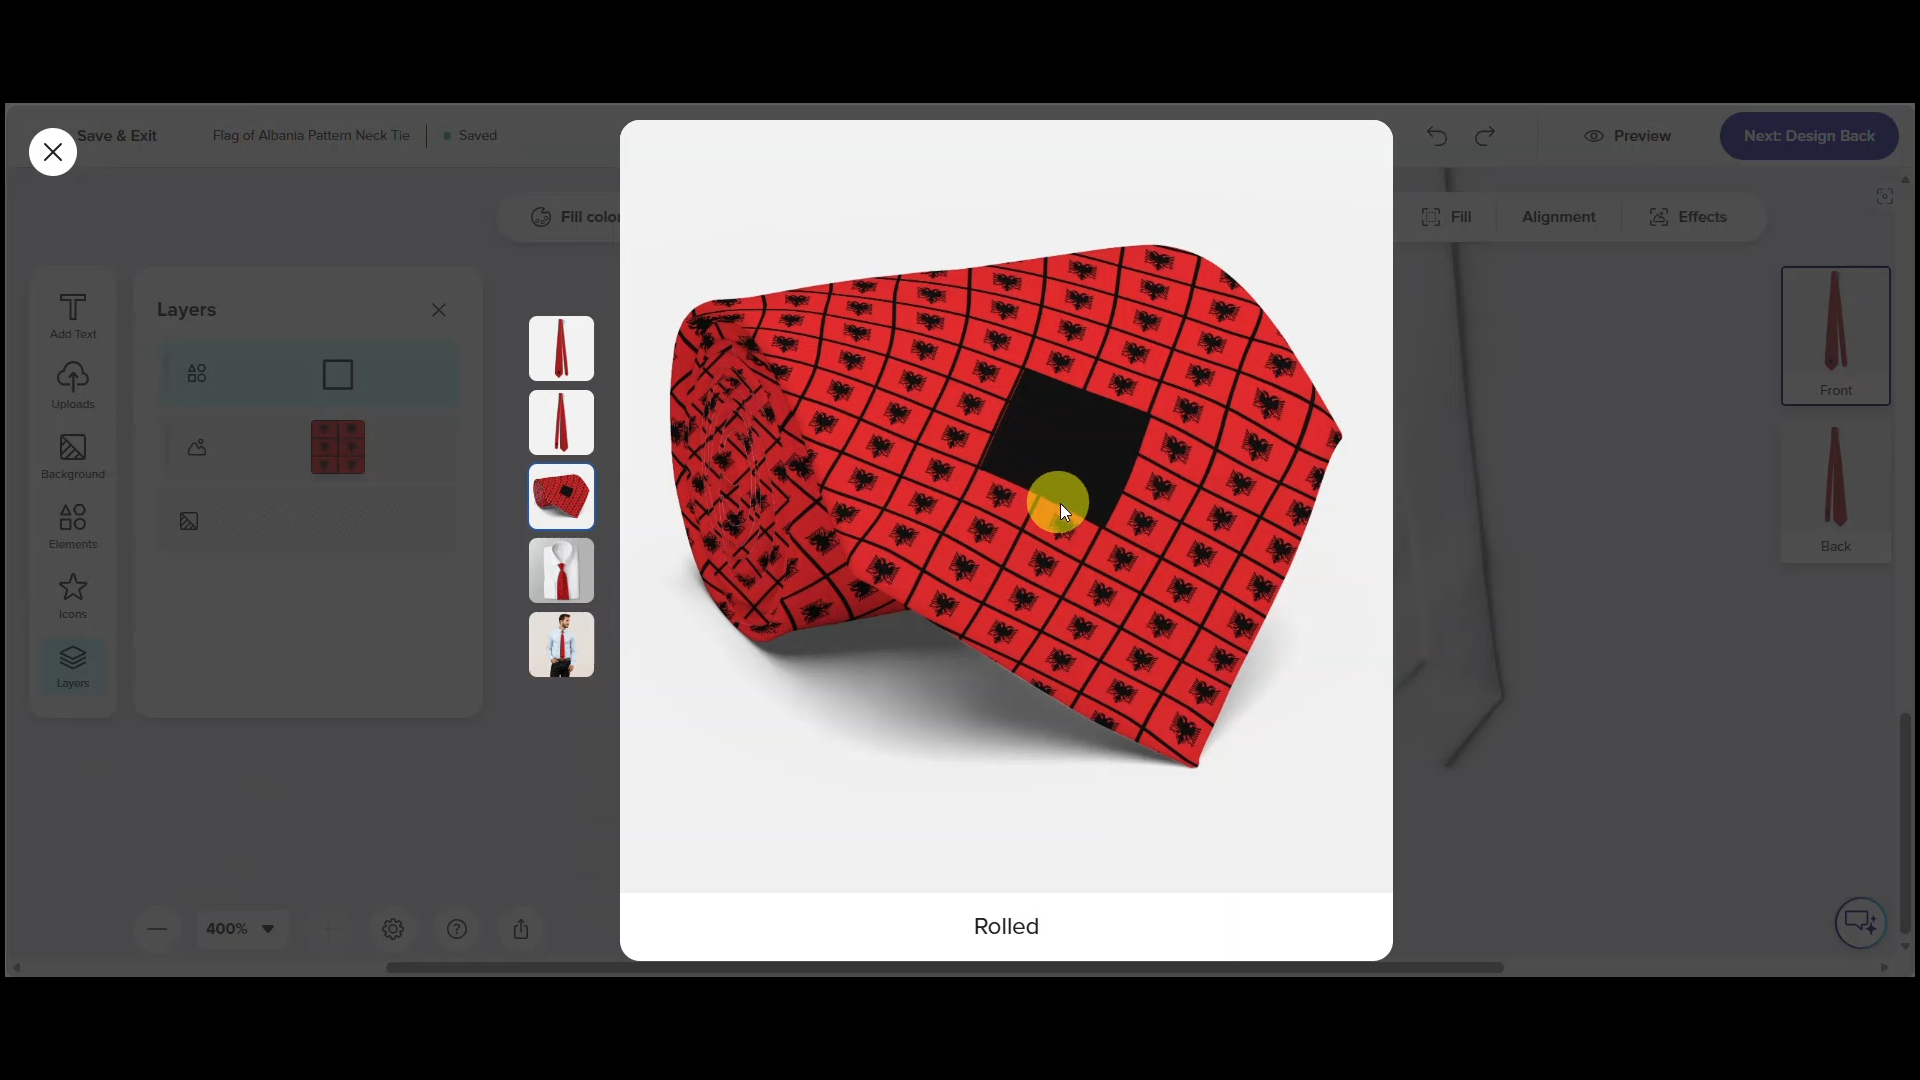
Use the rolled tie preview to check the alignment of your monogram background in relation to the background pattern. Click the X in the upper left-hand corner to close the preview when you're ready.
Step 17
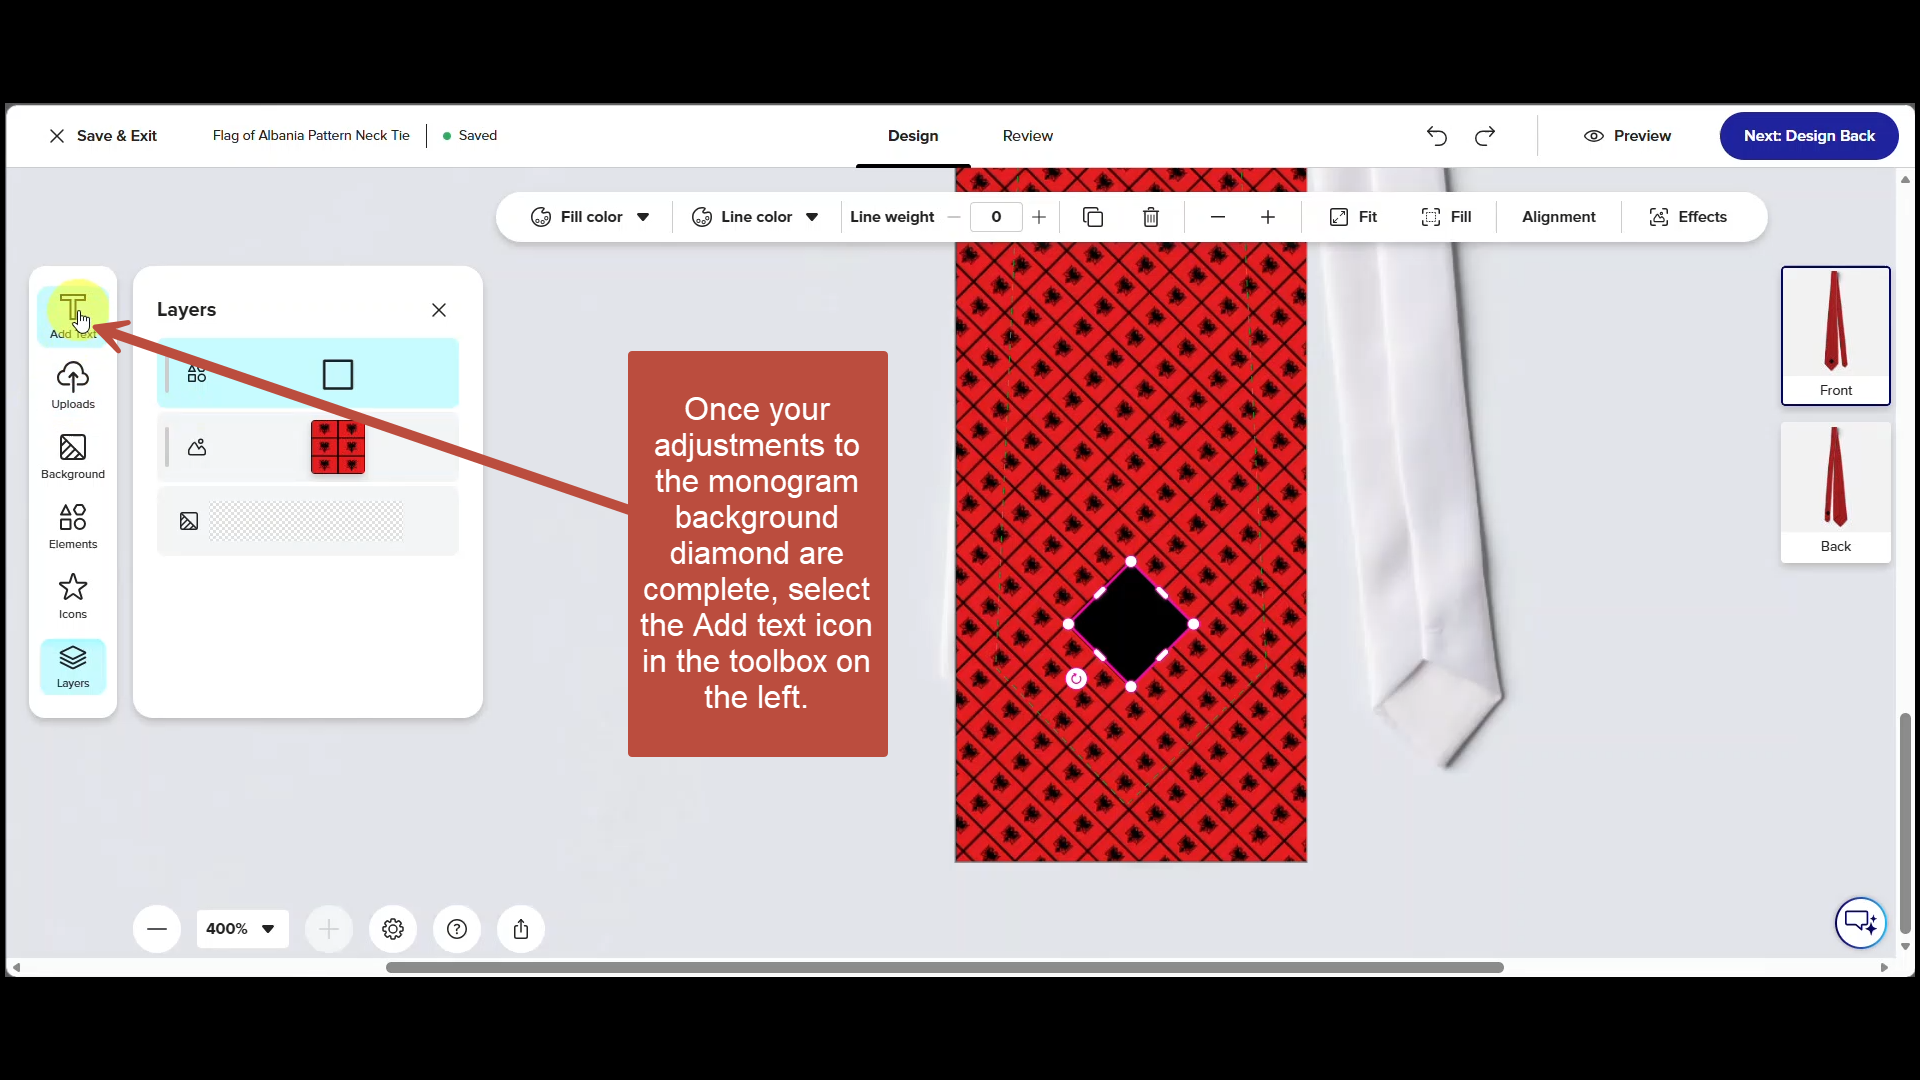
Once you have completed any final adjustments to the monogram background (the diamond), click on the text icon in the Tool Box.
Step 18
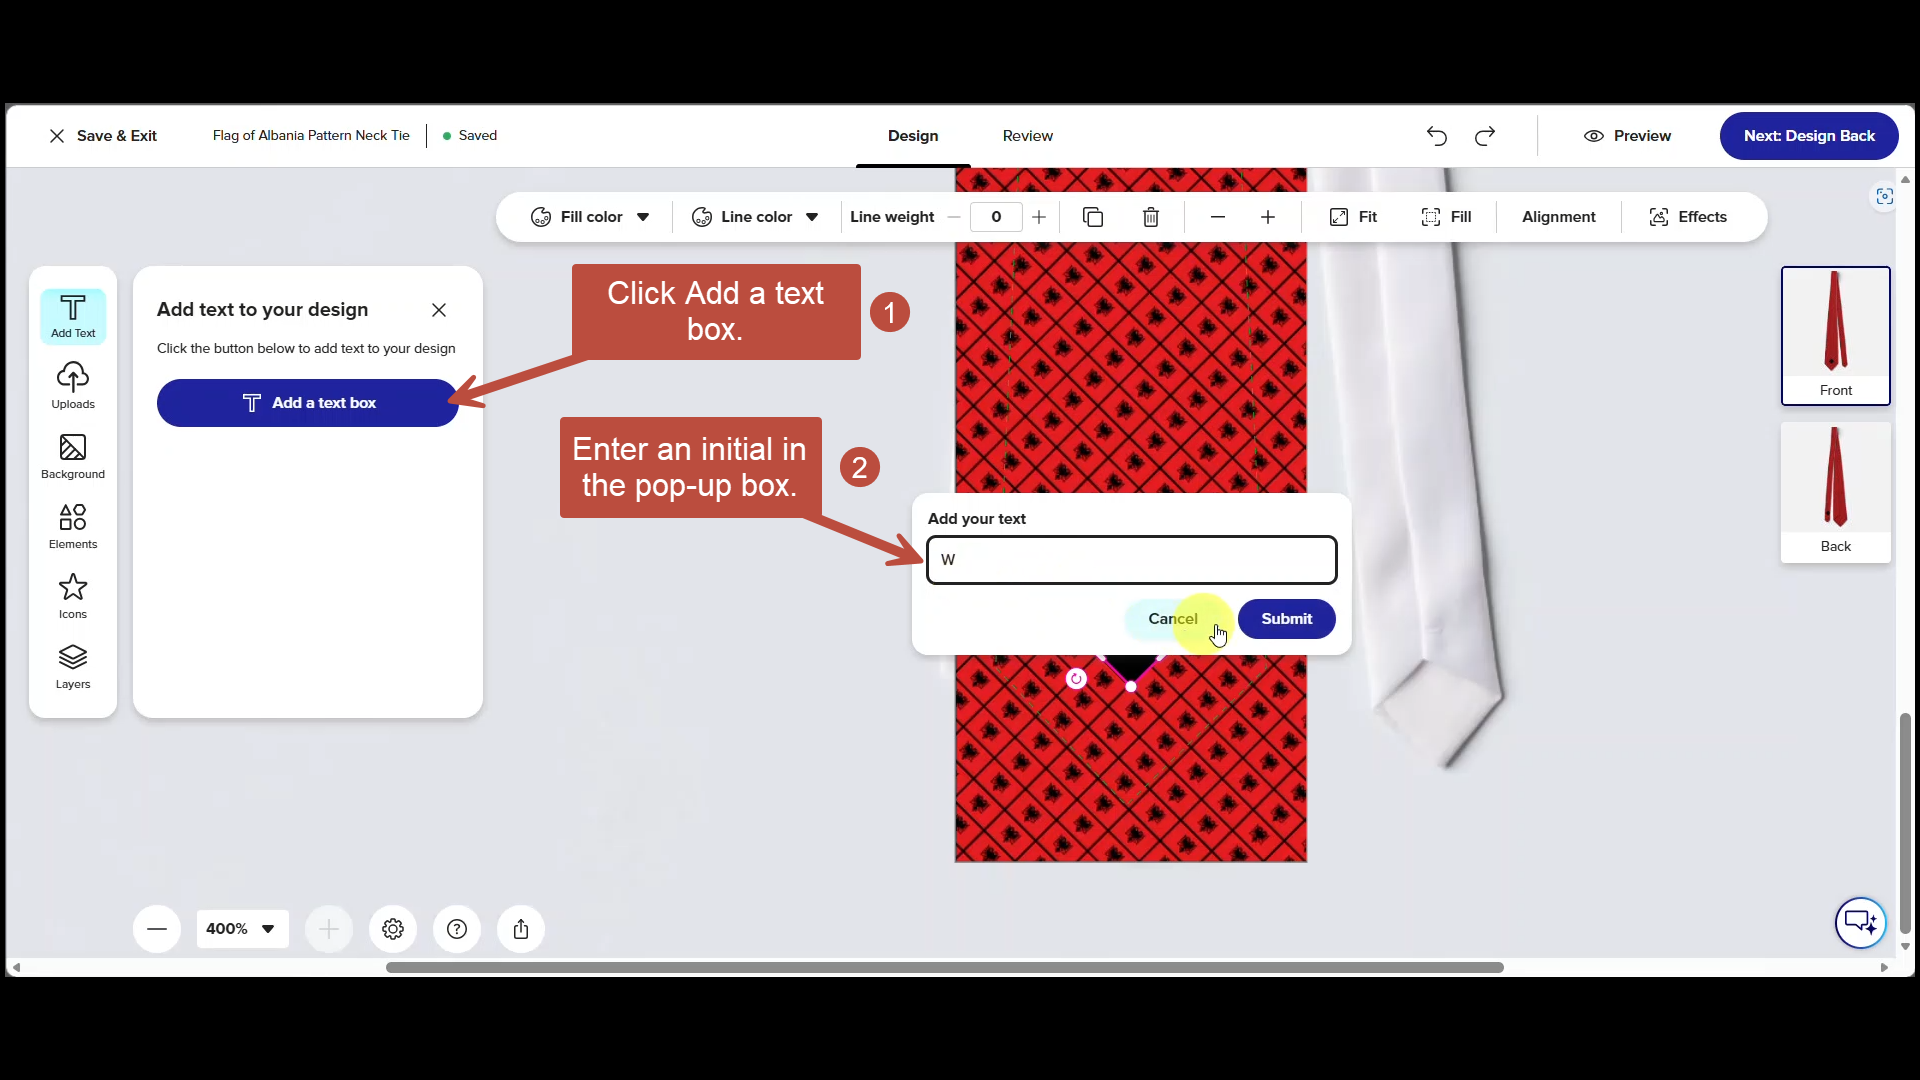
Click the blue Add a Text Box button. Then enter an initial in the pop-up box.
Step 19
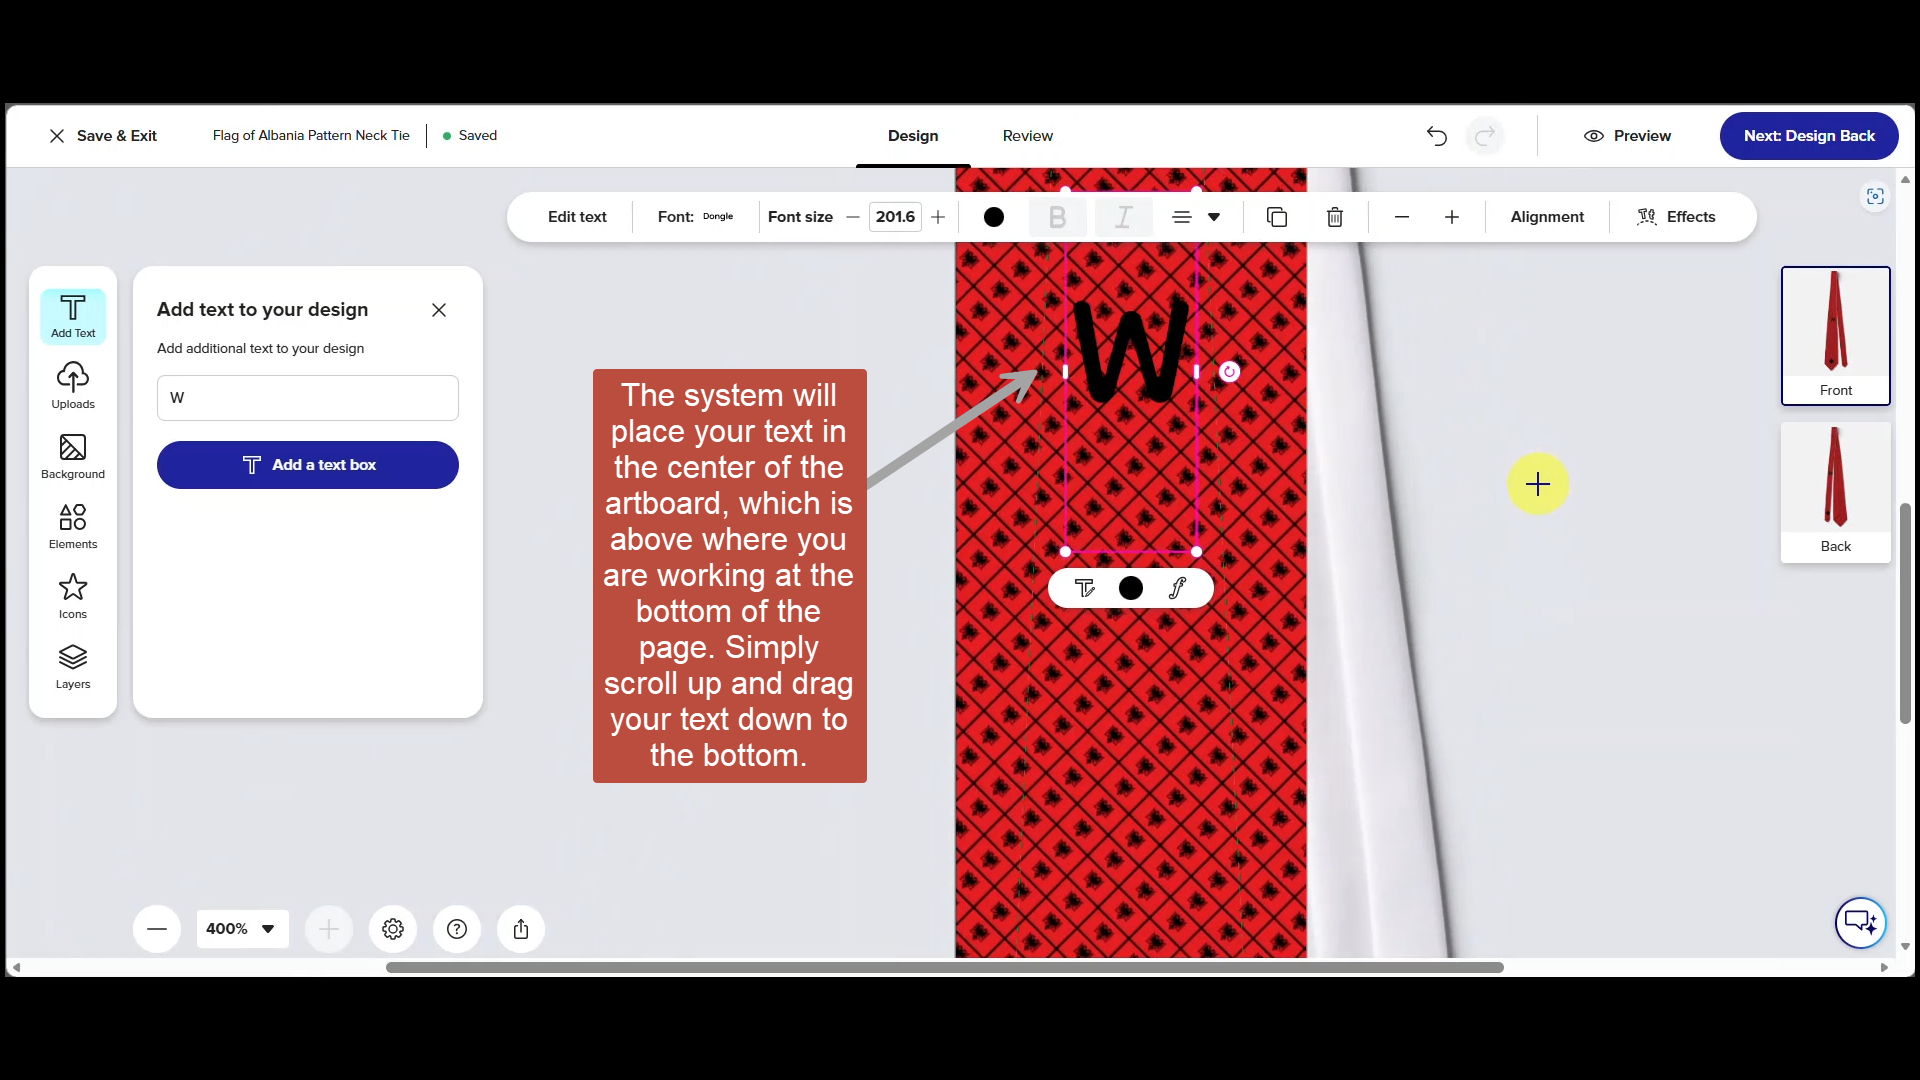
It is likely the text will be placed in the center of the art board, which is above the area shown in the previous screenshot. You'll need to scroll up and drag the initial down to the monogram background or you can use the alignment function to move it quickly.
Step 20
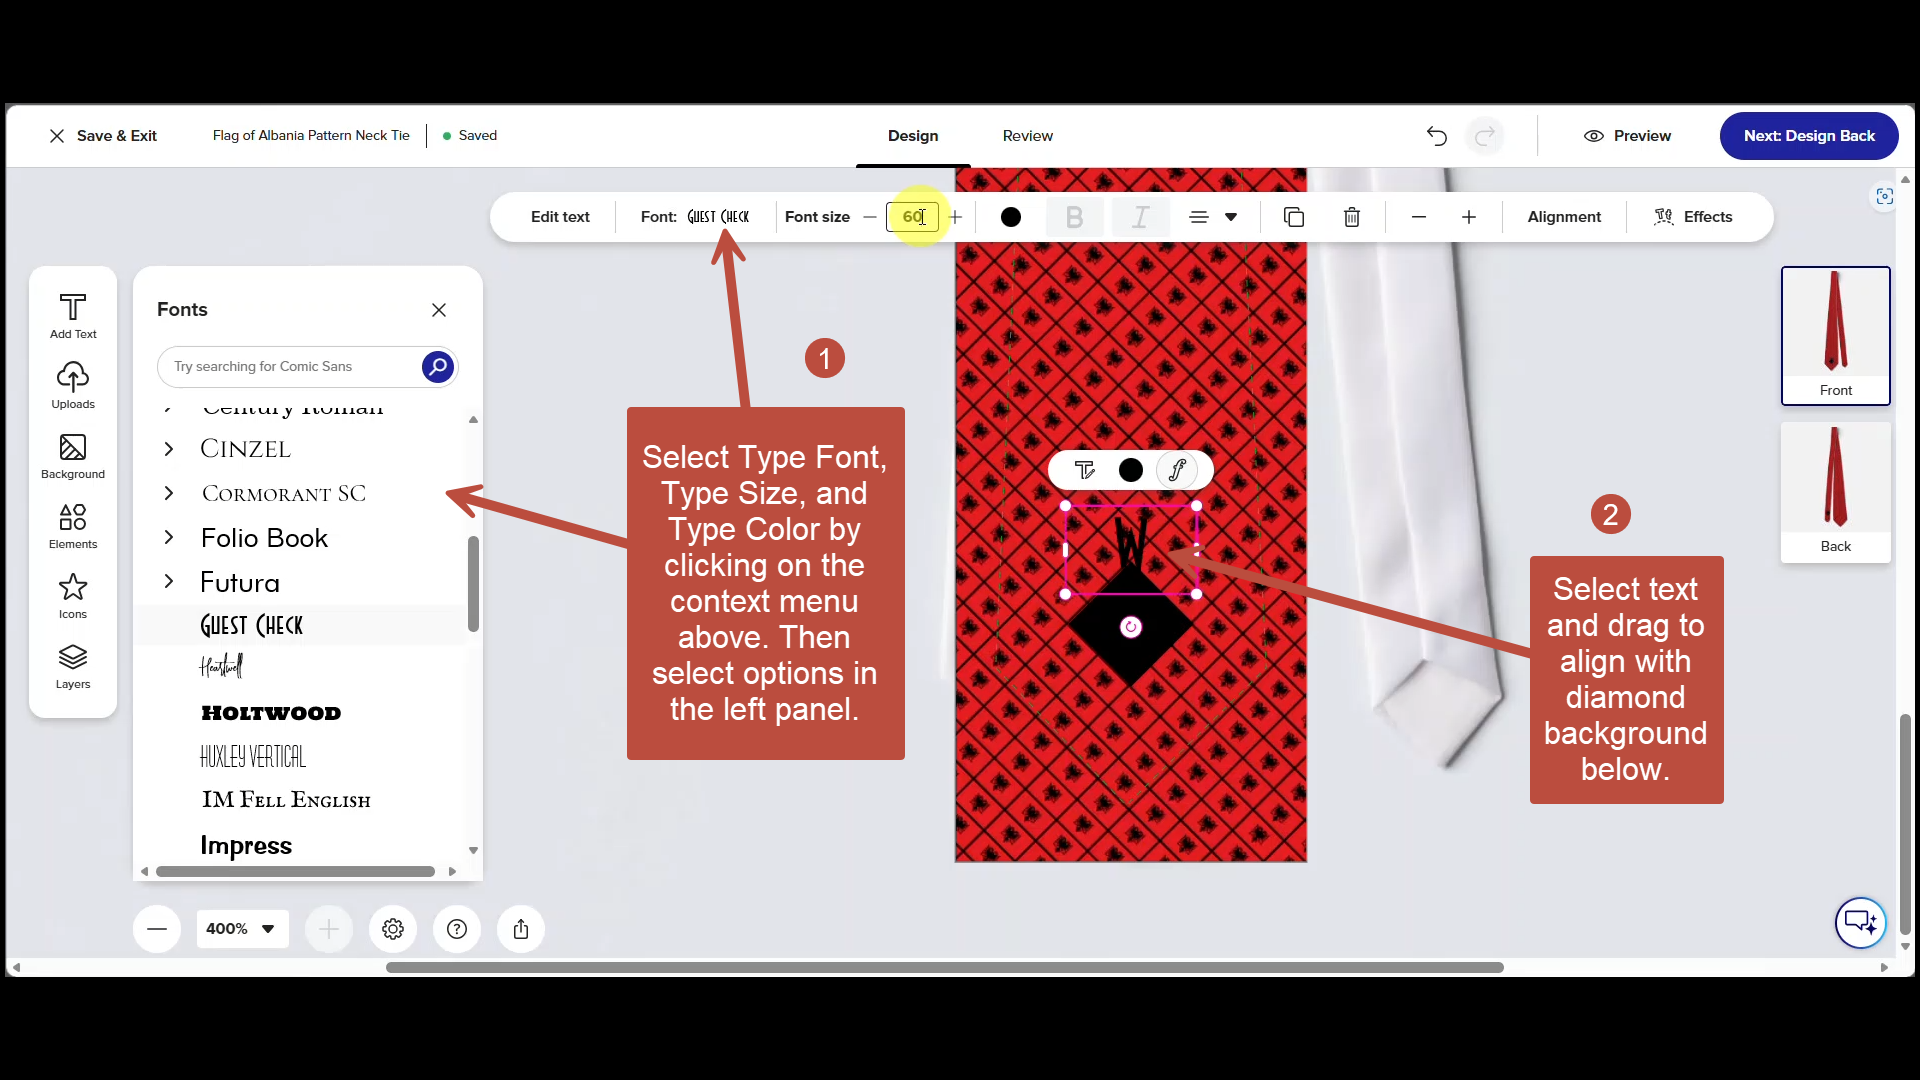
To customize text, select type font, type size, and type color by clicking on the context menu at the top of the screen. Then select specific options in the left panel. Once formatted, drag the Letter to align with the diamond background below.
Step 21
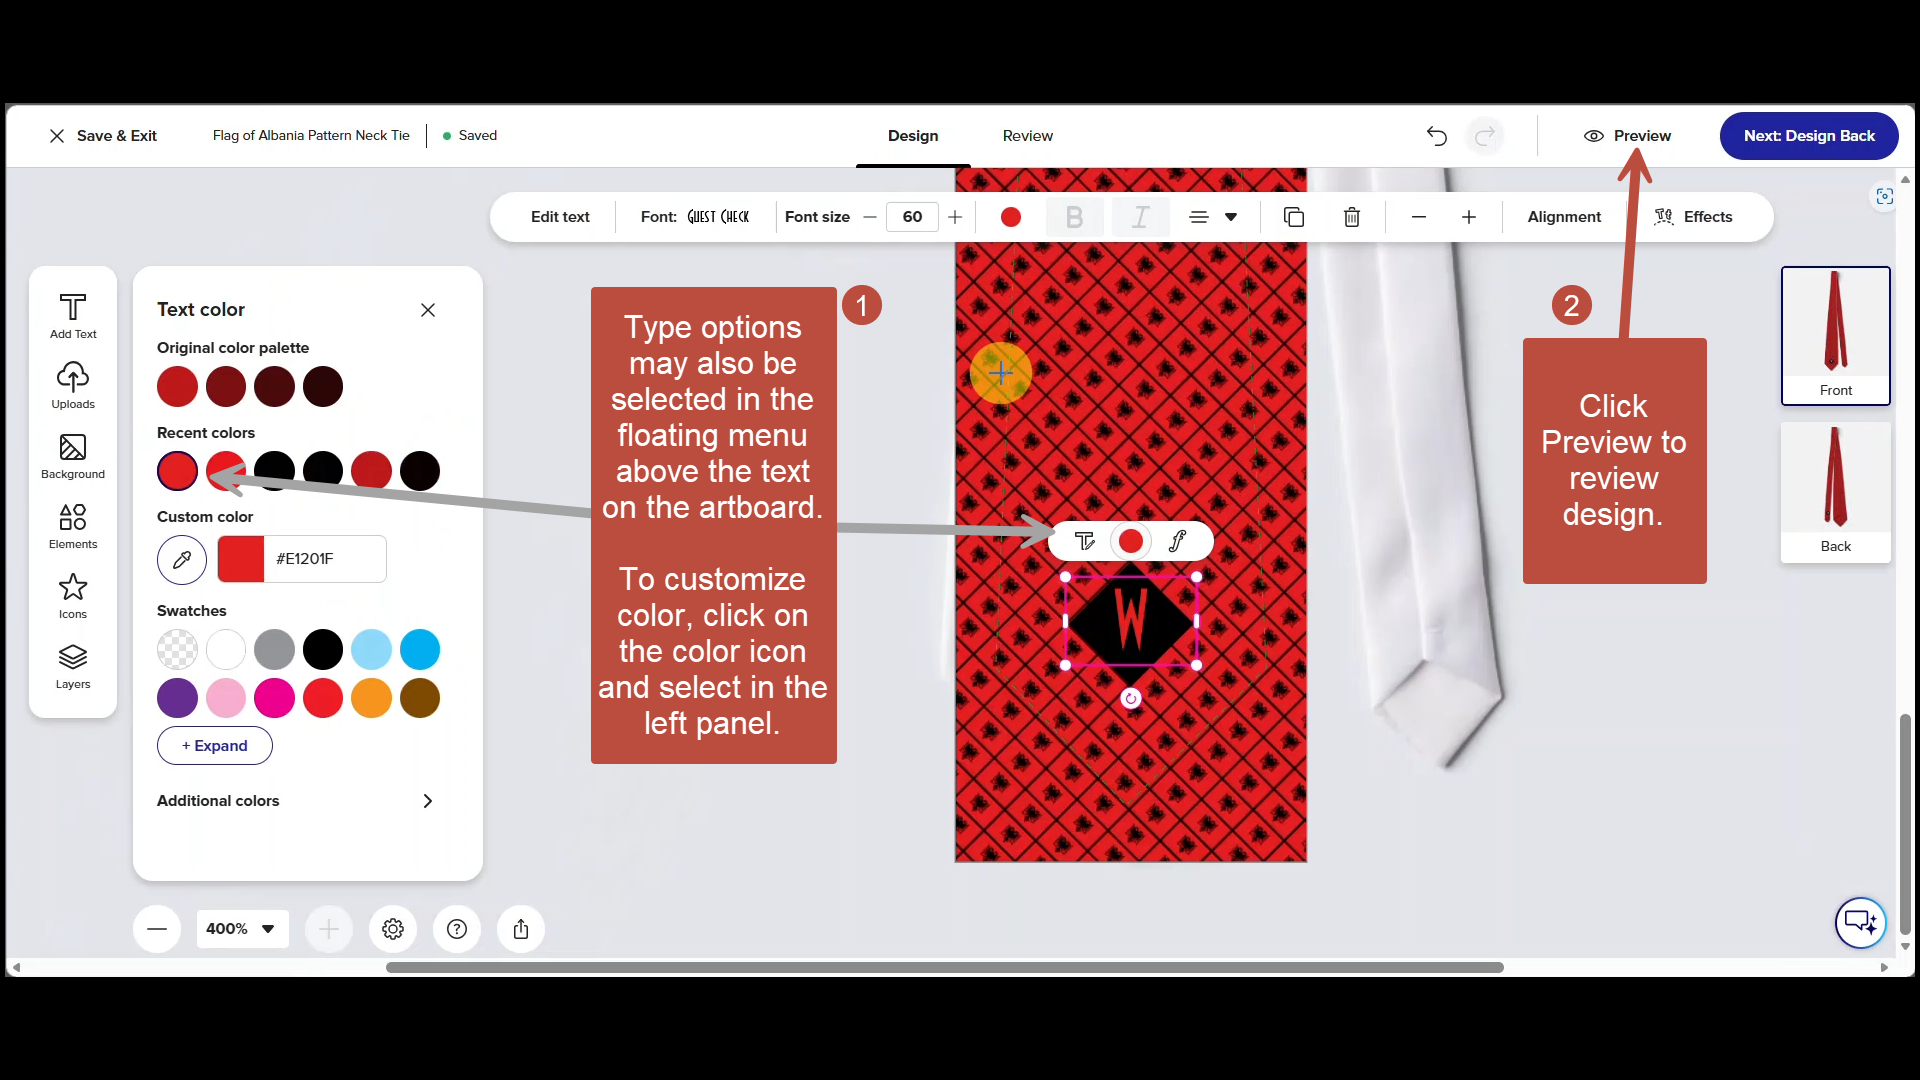
- Type options may also be selected in the floating menu above the text on the artboard. To customize color, click on the color icon and select in the left panel.
- Once text is formatted and positioned, check it one last time in preview.
Step 22
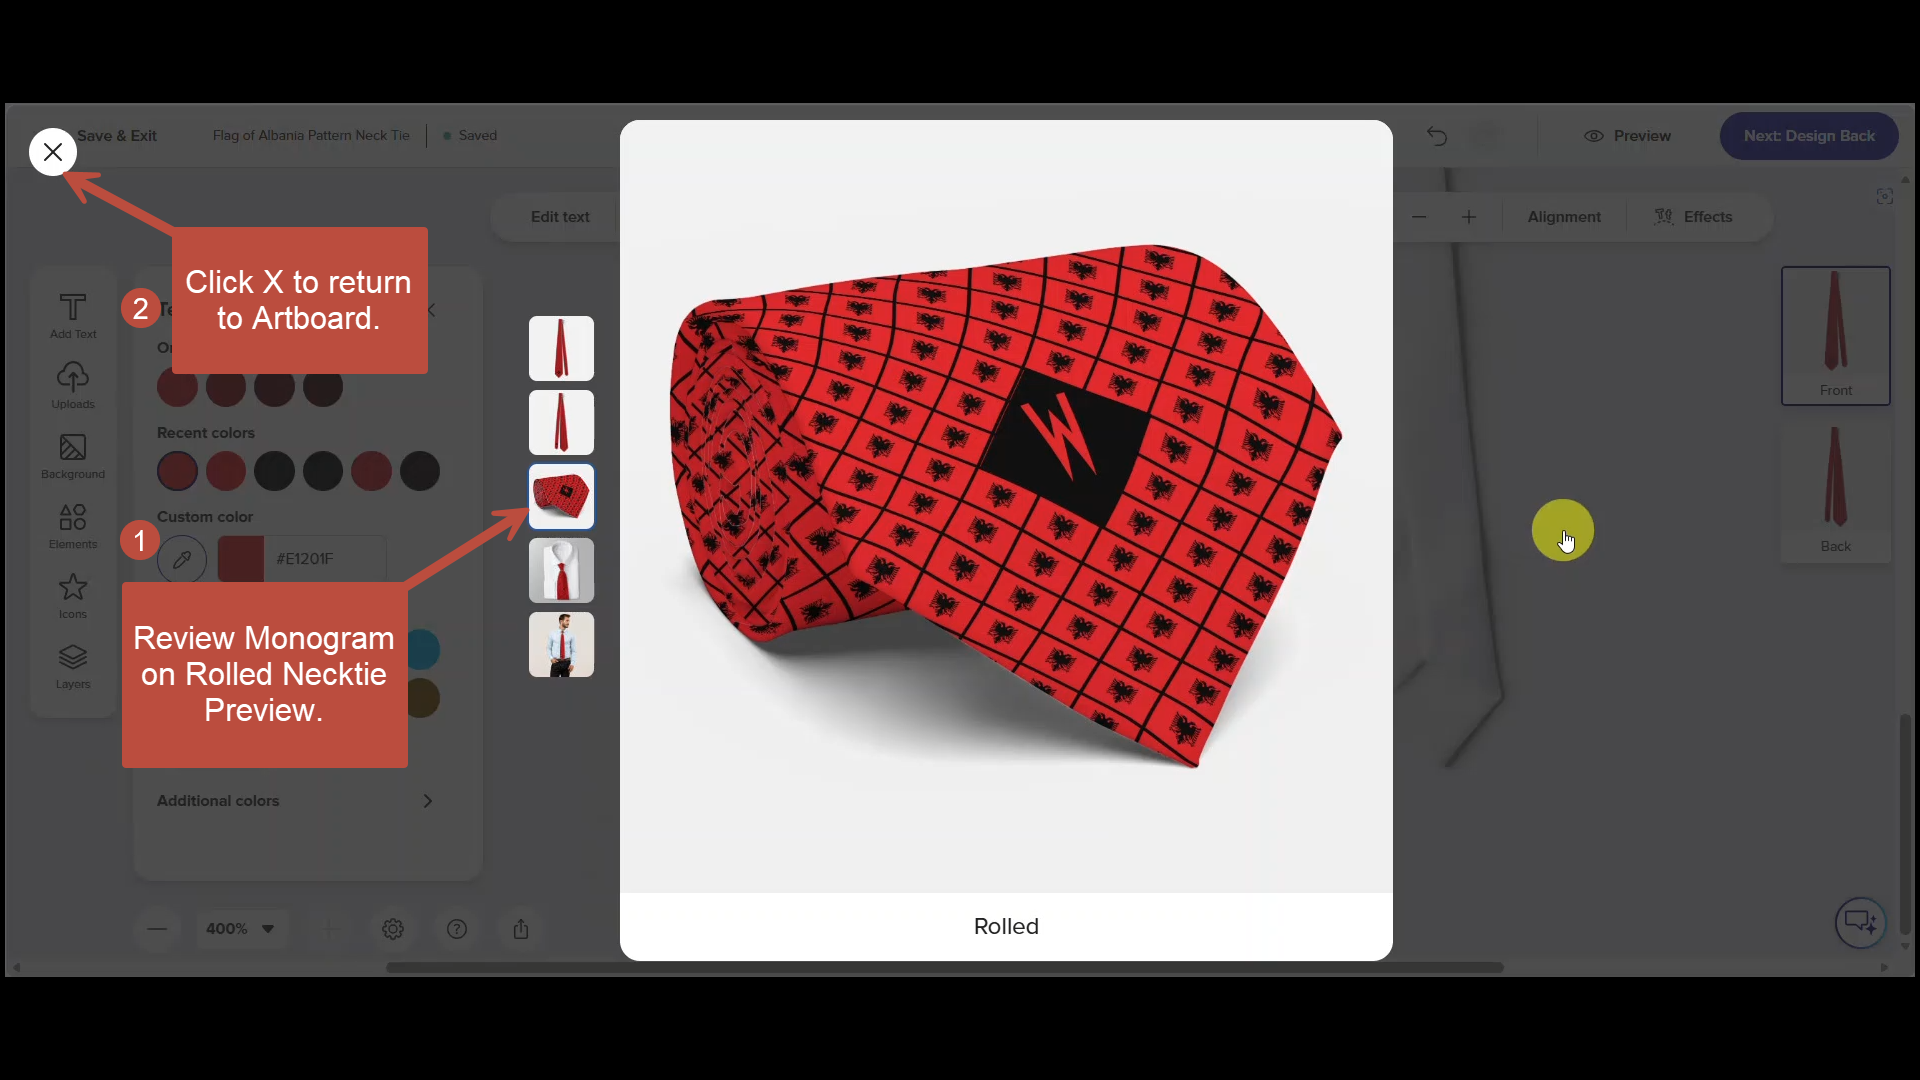
- Review Monogram on Rolled Necktie Preview.
- Click X to return to Art Board.
Step 23
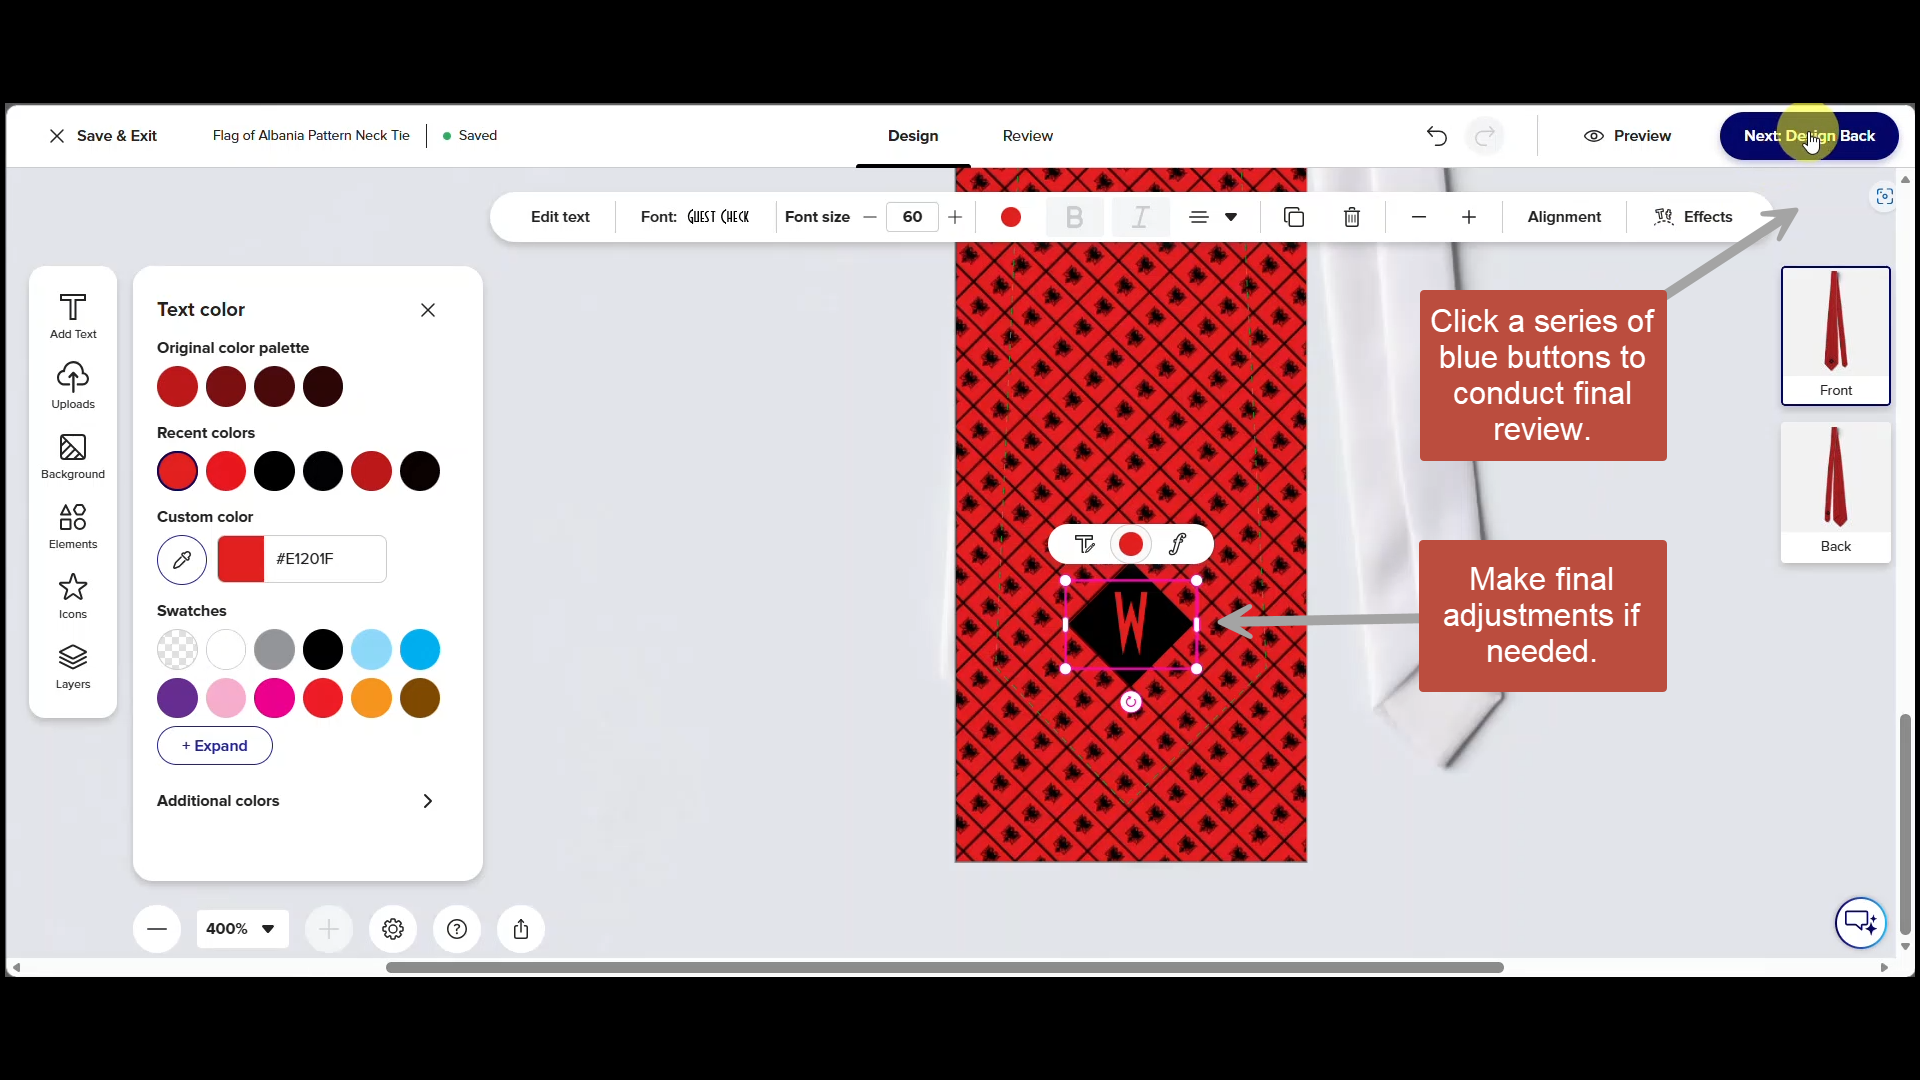
Make final adjustments if needed. Then click the blue buttons in the upper right-hand corner to conduct the final review.
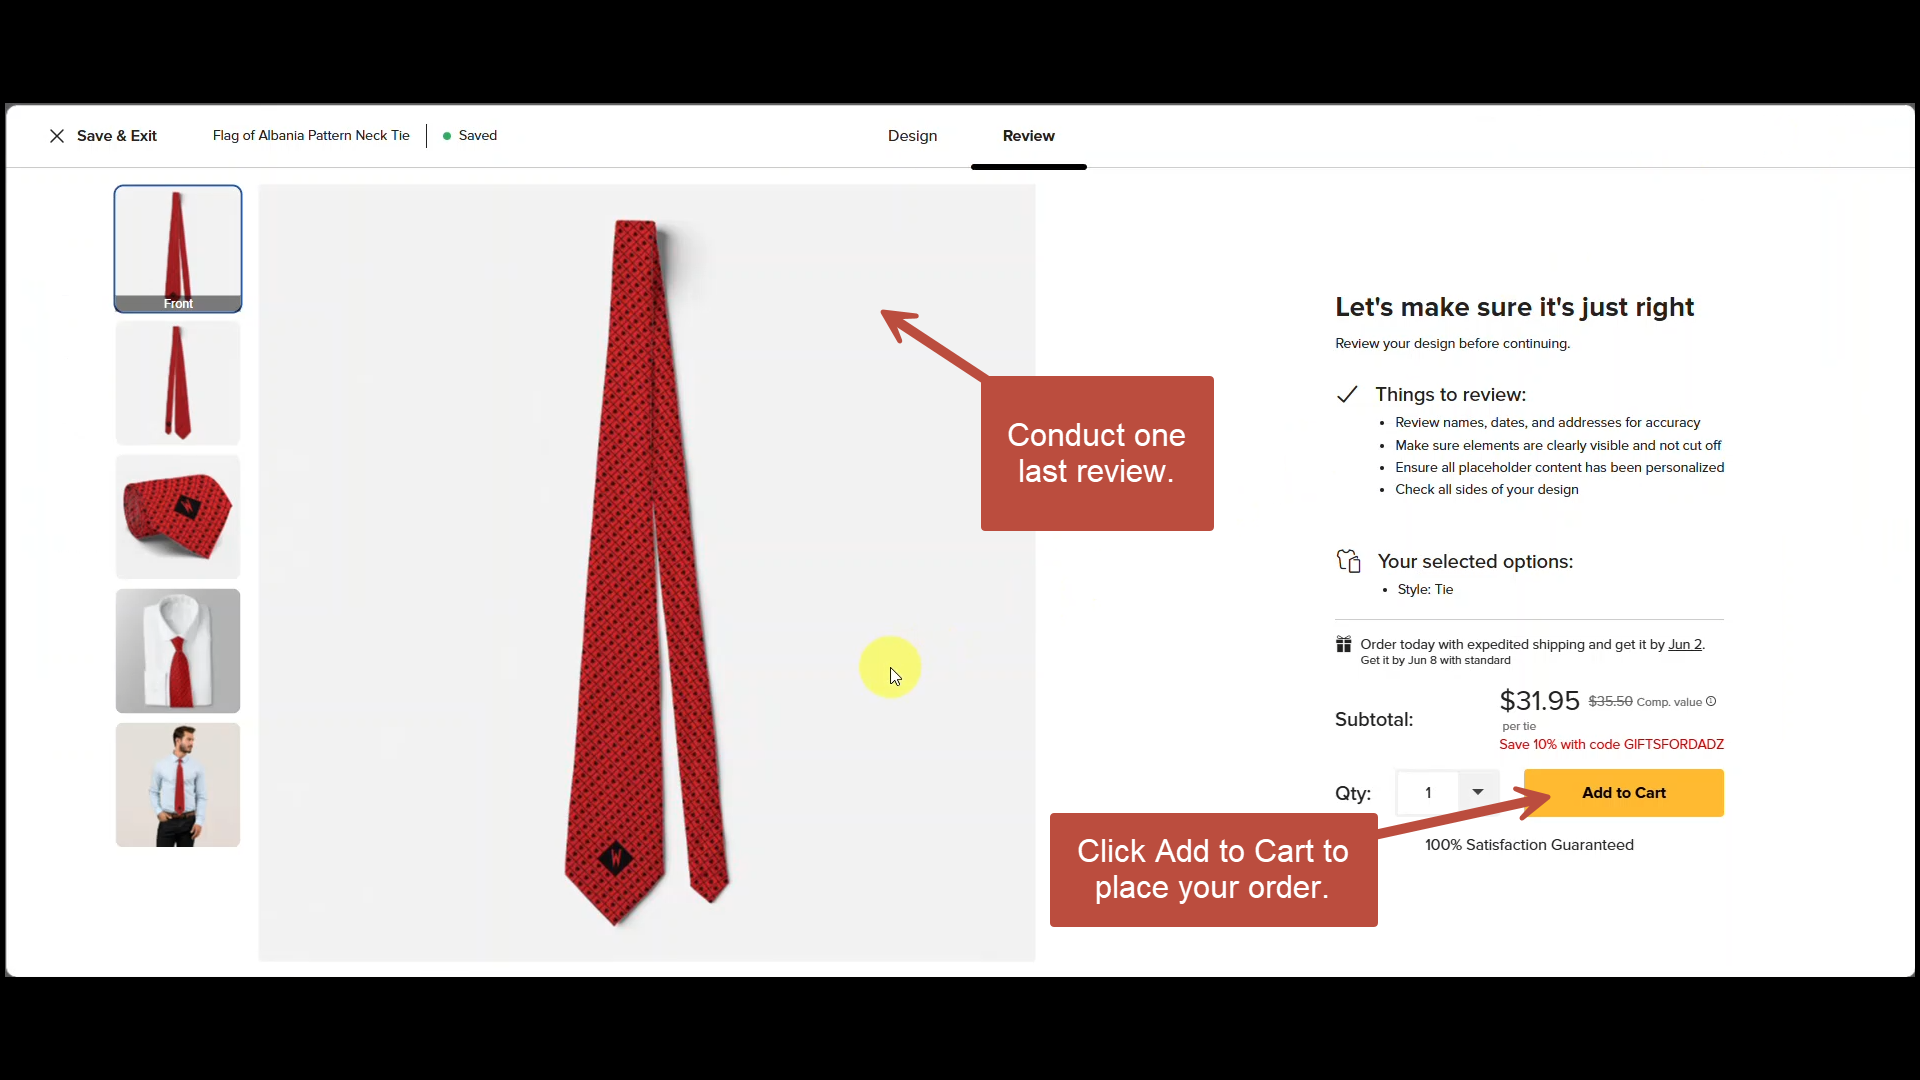
Step 24
Conduct final review and if you are satisfied with your design, click Add to Cart to place your order.
Final Tips, Links and Downloads
That’s it — you’ve added a personalized monogram to your flag necktie. Before you start, consider creating a free Zazzle account. This saves your designs automatically, lets you return later if needed, and makes sharing easier — no credit card required. Ready to try it yourself? Explore over 200 customizable flag ties at MyTies.net.
In case you'd like to download a copy of the steps on how to add a monogram to a flag neck tie, Here's a PDF:
Pin it