

If you opened Zazzle's product designer recently and found yourself staring at the screen thinking "where did everything go?" — that's a completely reasonable reaction. Zazzle has rolled out a new interface for its online designer, and at first glance it looks different enough to be genuinely disorienting.
Here's what I can tell you after spending real time with it: nothing important was taken away. The tools are all still there. They just moved.
The One Thing That Makes the New Interface Click
The old Zazzle designer kept its tools in a panel on the right side of the screen. The new interface moves them to a dynamic toolbar that appears above the artboard — and this is the key thing to understand: the toolbar only shows up when you select something.
Click on text and text tools appear. Click on an image and image tools appear. Click on nothing and the toolbar disappears entirely.
That last part is what throws most people off. It looks like the tools are missing. They're not. They're just waiting for you to click on something. Once that clicks — no pun intended — the whole interface makes sense.
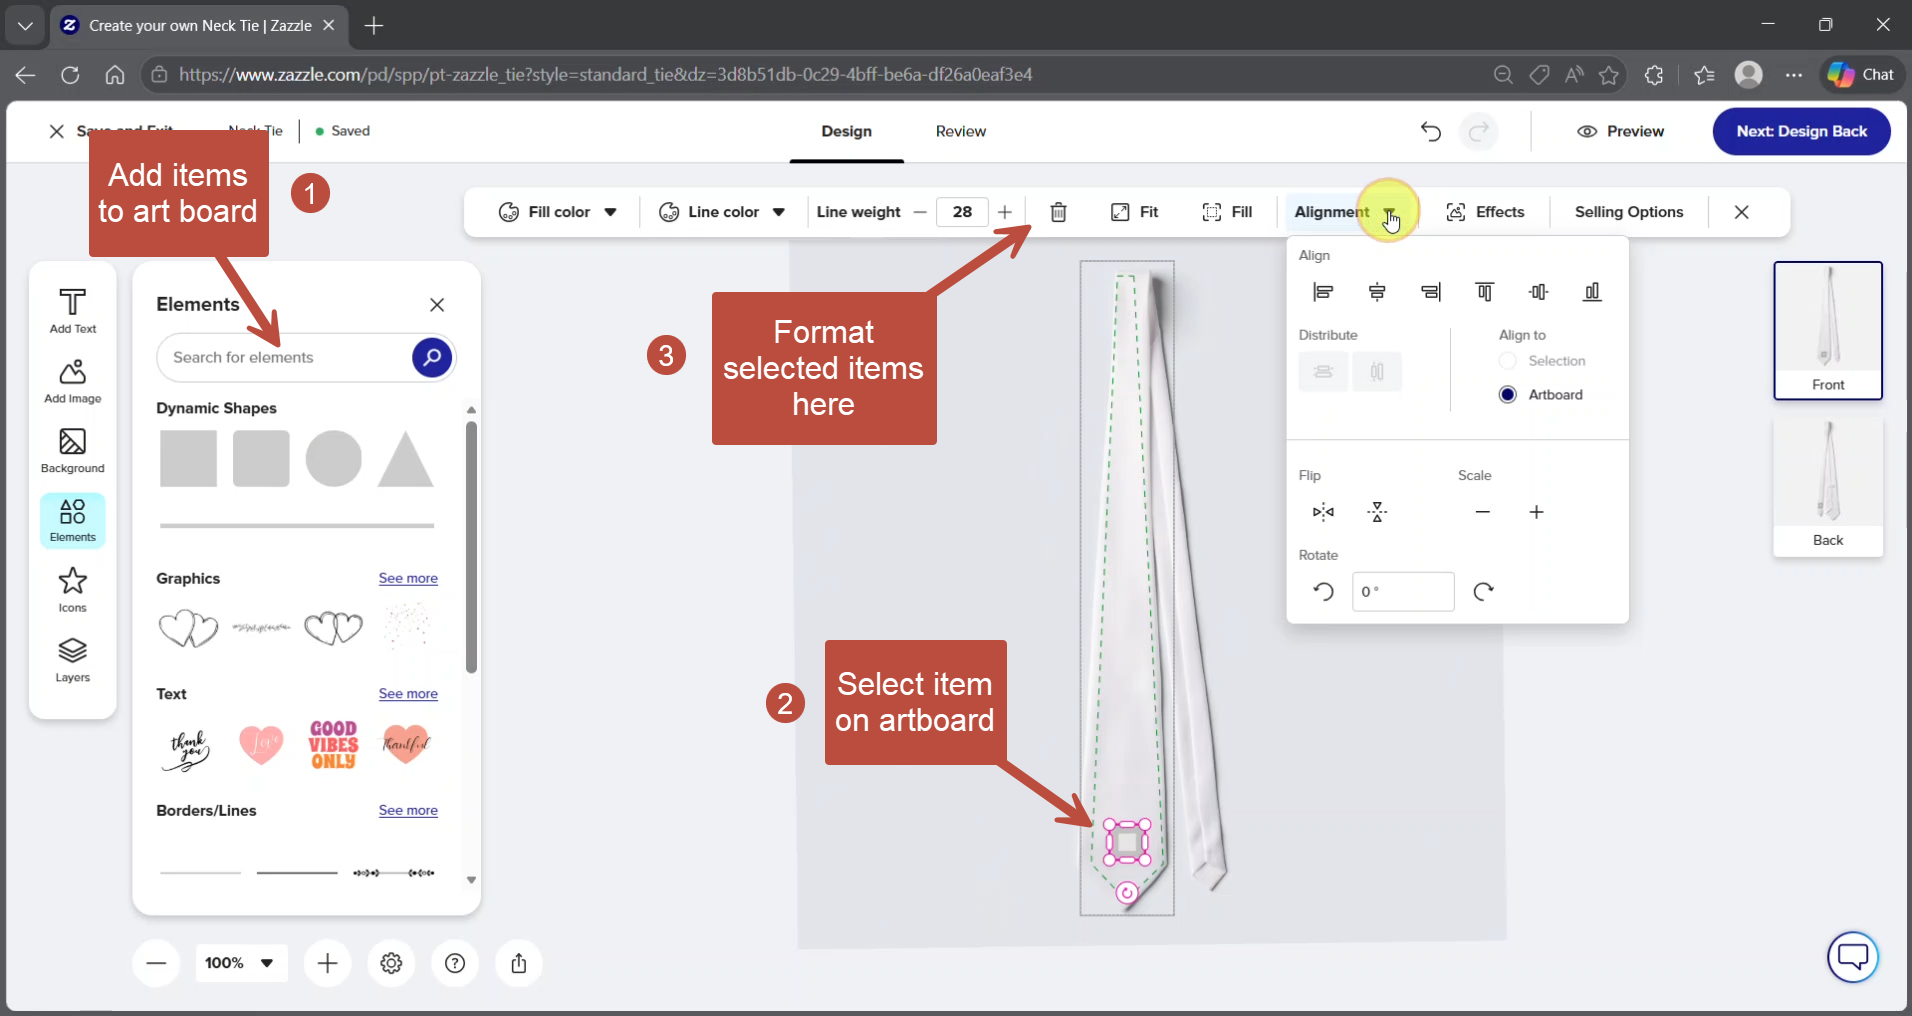
Once you add an item to the art board, if you select it, the formatting menu above the artboard will be activated, providing you with appropriate options to revise your selection.
What Stayed the Same
Despite the visual overhaul, the actual capabilities haven't changed. You can still add and edit text, upload your own images, resize and rotate elements, create repeating patterns, and preview the finished product before buying. If you've personalized a Zazzle product before, you already know how to do everything the new interface offers. You just need to learn where to look for the tools.
The Layers panel is still on the left. The artboard is still in the center. The workflow is the same — select something, edit it, move on.
What It Looks Like in Practice
I put the new interface through its paces using one of my flag necktie designs as the guinea pig. The goal was a fully designed tie from scratch — pattern background, monogram, color matching, both sides of the tie — using only the new tools.
The adjustment period lasted about ten minutes. After that it started feeling natural, and I'll admit the contextual toolbar is actually cleaner than the old right-side panel once you get used to it. Having only the relevant tools visible for whatever you're working on reduces visual clutter in a way that the old interface didn't.
A few things I noticed along the way: the Effects button — which is where you go to create repeating patterns from an uploaded tile — is easy to miss at first because it only appears in the toolbar after you've selected an image on the artboard. Same principle as everything else in the new interface. Select first, then look for the tool.
The Layers panel on the left is your best friend for managing complex designs. If you have multiple elements stacked on the artboard and can't click directly on the one you want, the Layers panel lets you select it there instead
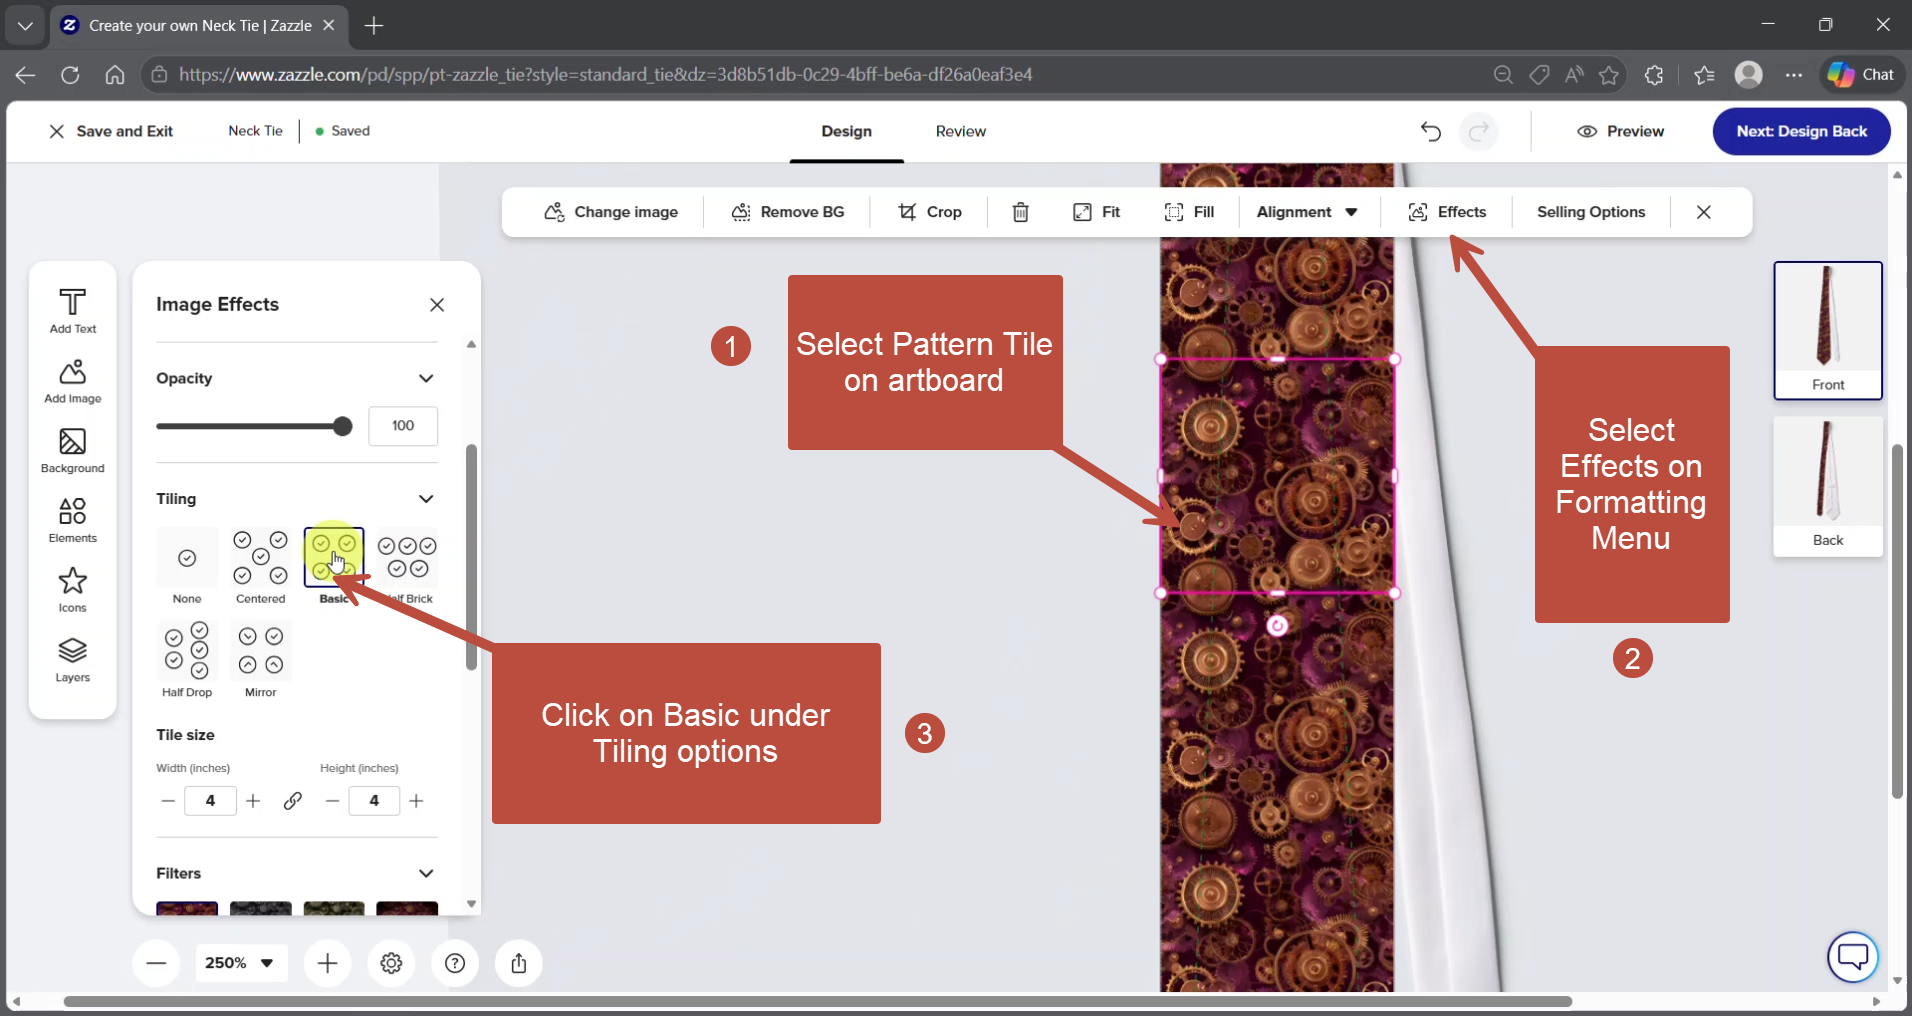
Figure 2: After you place a pattern tile on the art board, click on Effects on the Formatting menu at the top, to activate image effects options in the left side panel.
The Bottom Line
Zazzle didn't take anything away. They reorganized the workspace. Once you understand that the toolbar is contextual — that it responds to what you select — the rest falls into place quickly.
If you're about to customize one of my necktie designs for the first time, or if you're returning after a break and finding the new layout unfamiliar, I've put together a full walkthrough on the tutorial page. It covers the complete process step by step, with a video demonstration and written instructions you can follow along with while you have Zazzle open in another tab. There's also a downloadable cheat sheet if you want a quick reference you can pull up on your phone while you work.