

Getting Started with the New Zazzle Designer: A Simple Necktie Tutorial
A complete walkthrough for first-time users and anyone adjusting to the updated layout
Zazzle recently updated its product designer with a new layout that can feel unfamiliar at first — even to experienced users. This tutorial covers the complete process of customizing a product from start to finish using the new interface. The video above demonstrates everything using a personalized necktie as the example. The written steps below follow the same sequence and are designed to be used alongside the video or independently with Zazzle open in another tab.
Everything demonstrated here applies across Zazzle's full product catalog — not just neckties. Once you're comfortable with these tools, you can customize just about anything in the store.
Want a quick reference before you start? Download the PDF cheat sheet at the bottom of this page.
The Key Concept: The Toolbar Is Contextual
Before diving into the steps, one concept makes everything else easier to understand: the toolbar above the artboard only appears when you select something. If nothing is selected, the toolbar disappears — which can look like the tools are missing. They're not. Click on any element and the relevant tools appear immediately.
Step-by-Step: Using the New Zazzle Designer
Click images to enlarge

Step 1: Open the Designer
Navigate to any customizable product on Zazzle and click the Personalize or Edit This Design button. This opens the artboard — the main workspace where you'll build your design.
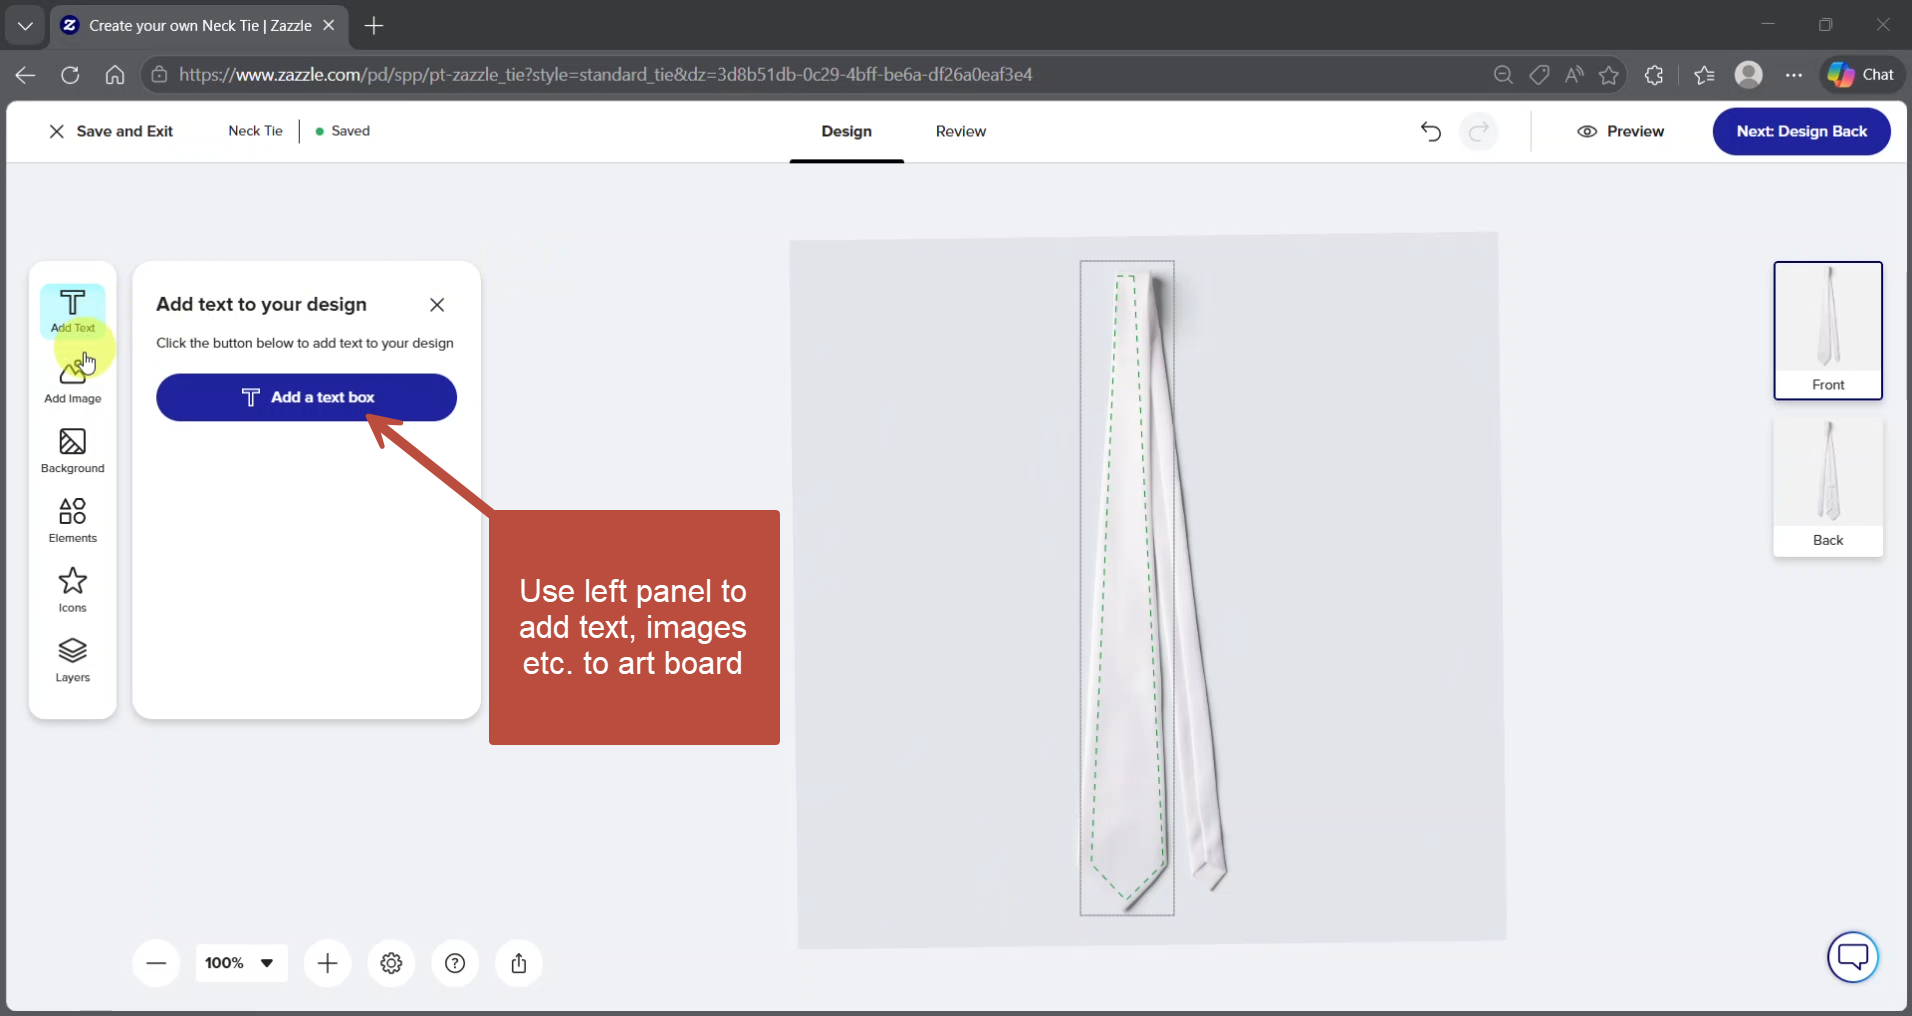
Step 2: Add Elements to the Artboard
Use the left-side panel to add the building blocks of your design. Options include:
- Add Text — Click the text icon to place a text block on the artboard
- Upload Image — Click the image icon to upload a file from your computer
- Add Elements — Access Zazzle's built-in shapes and design elements
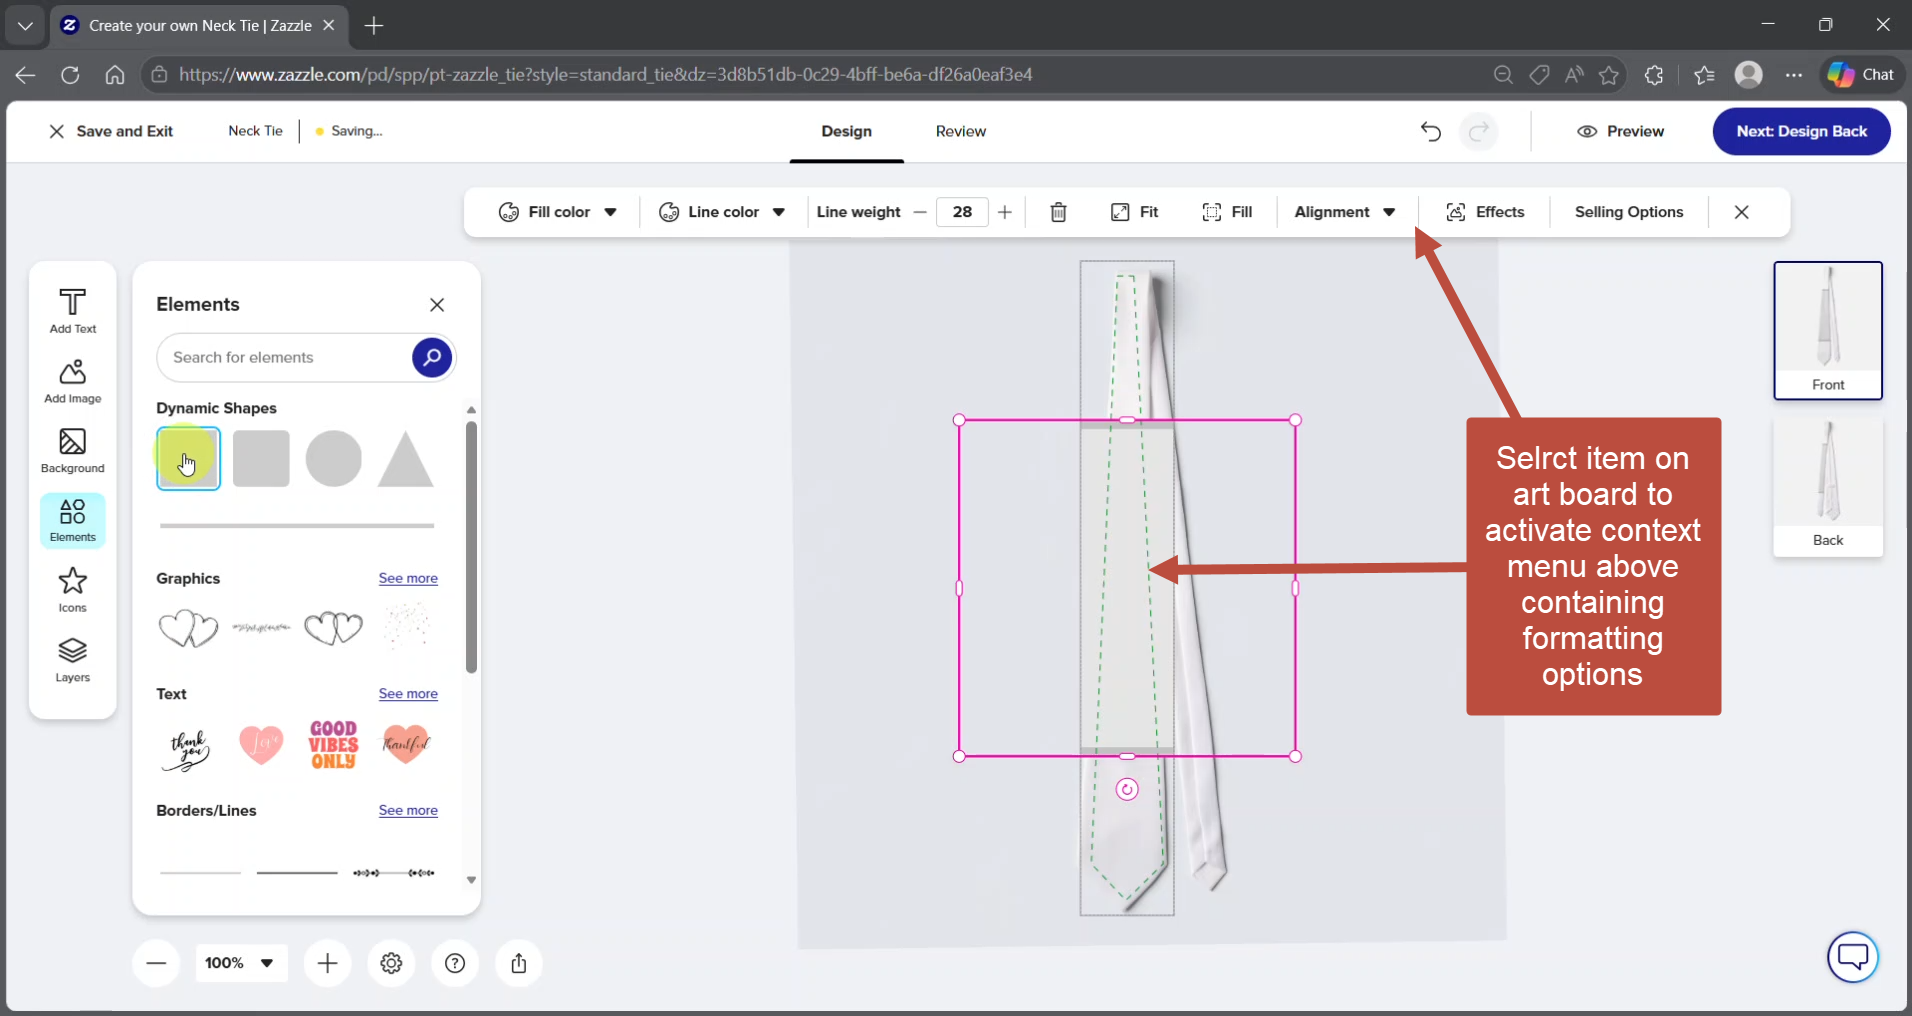
Step 3: Select an Element to Edit
Click on any element on the artboard. The contextual toolbar appears above the artboard with options specific to what you selected. For text you'll see font, size, alignment, and style controls. For images you'll see resize, rotation, and positioning options.

Step 4: Resize and Position Elements
With an element selected, drag the corner handles on the artboard to resize. Drag the element itself to reposition. Use the rotation control in the contextual toolbar to adjust the angle. (Alignment menu shown here as a pulldown menu now appears in the left panel.)
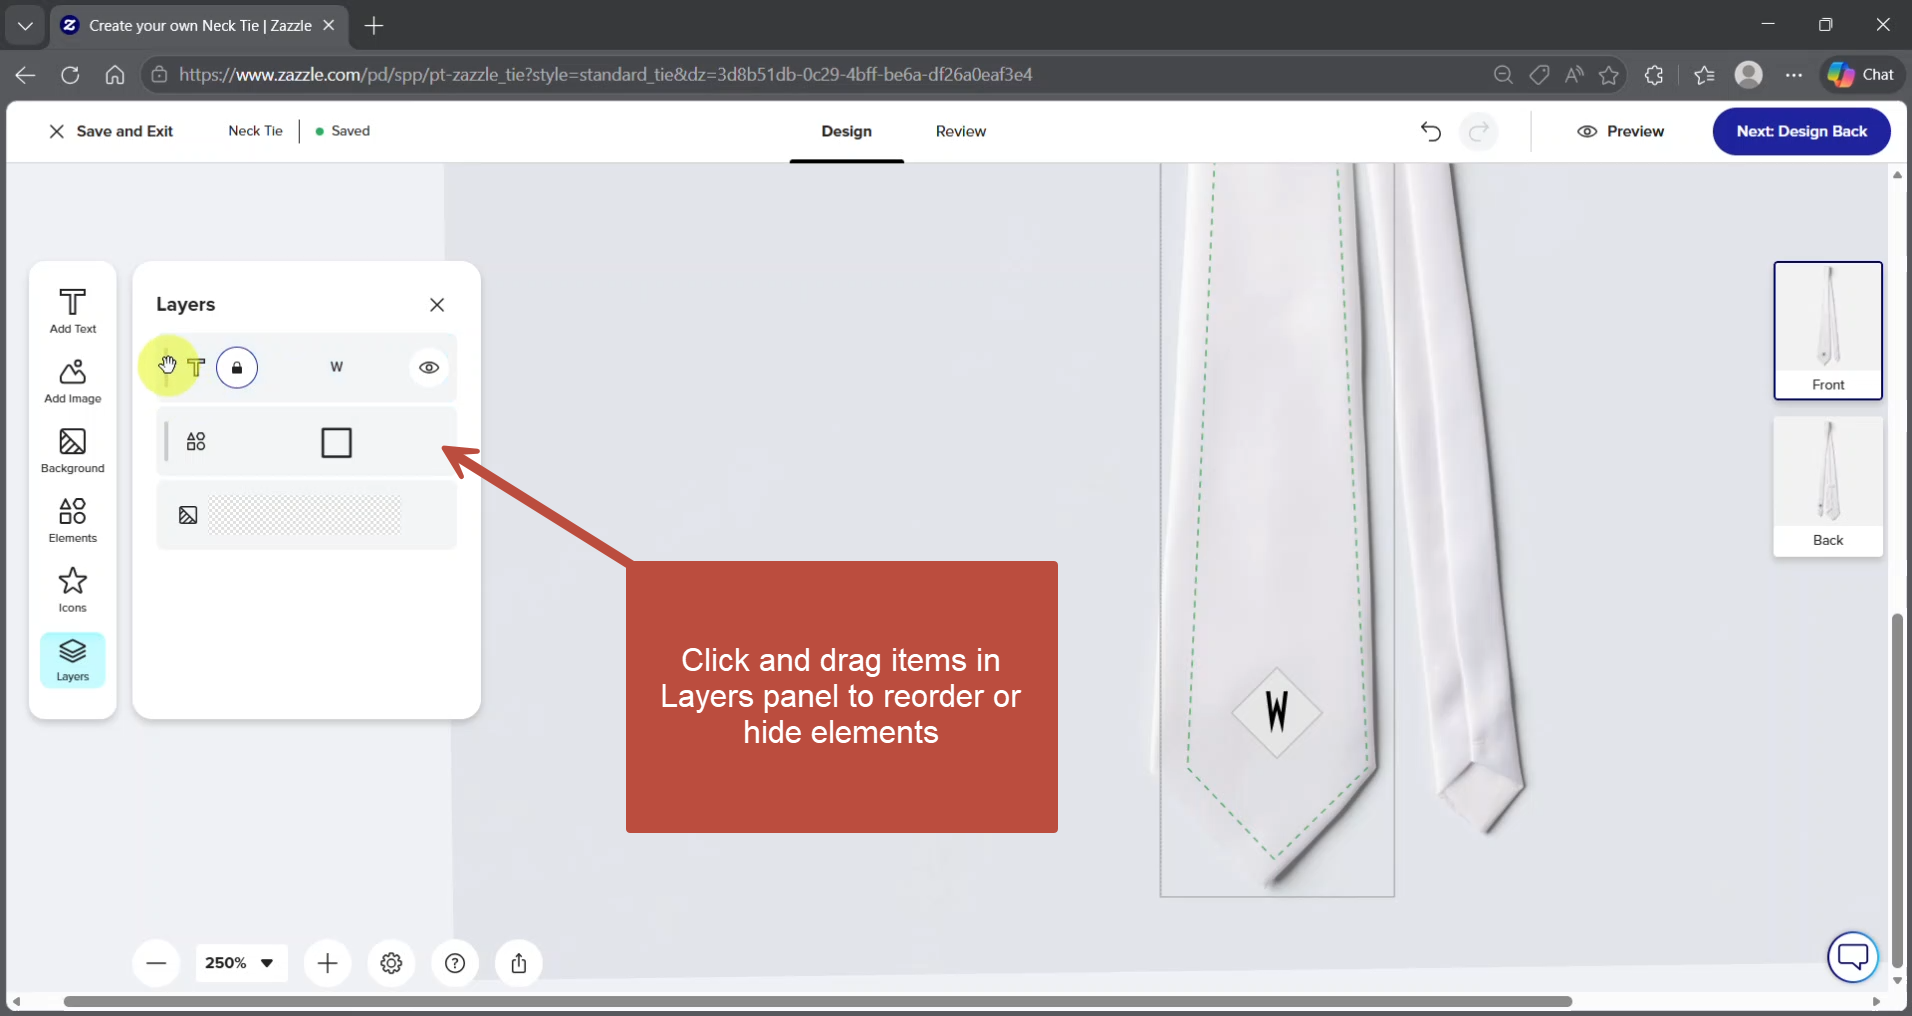
Step 5: Manage Layers
The Layers panel on the left side of the screen shows all elements in your design stacked in order. Use it to:
- Select elements that are difficult to click directly on the artboard
- Drag layers up or down to change which elements appear in front of or behind others
- Show or hide individual elements
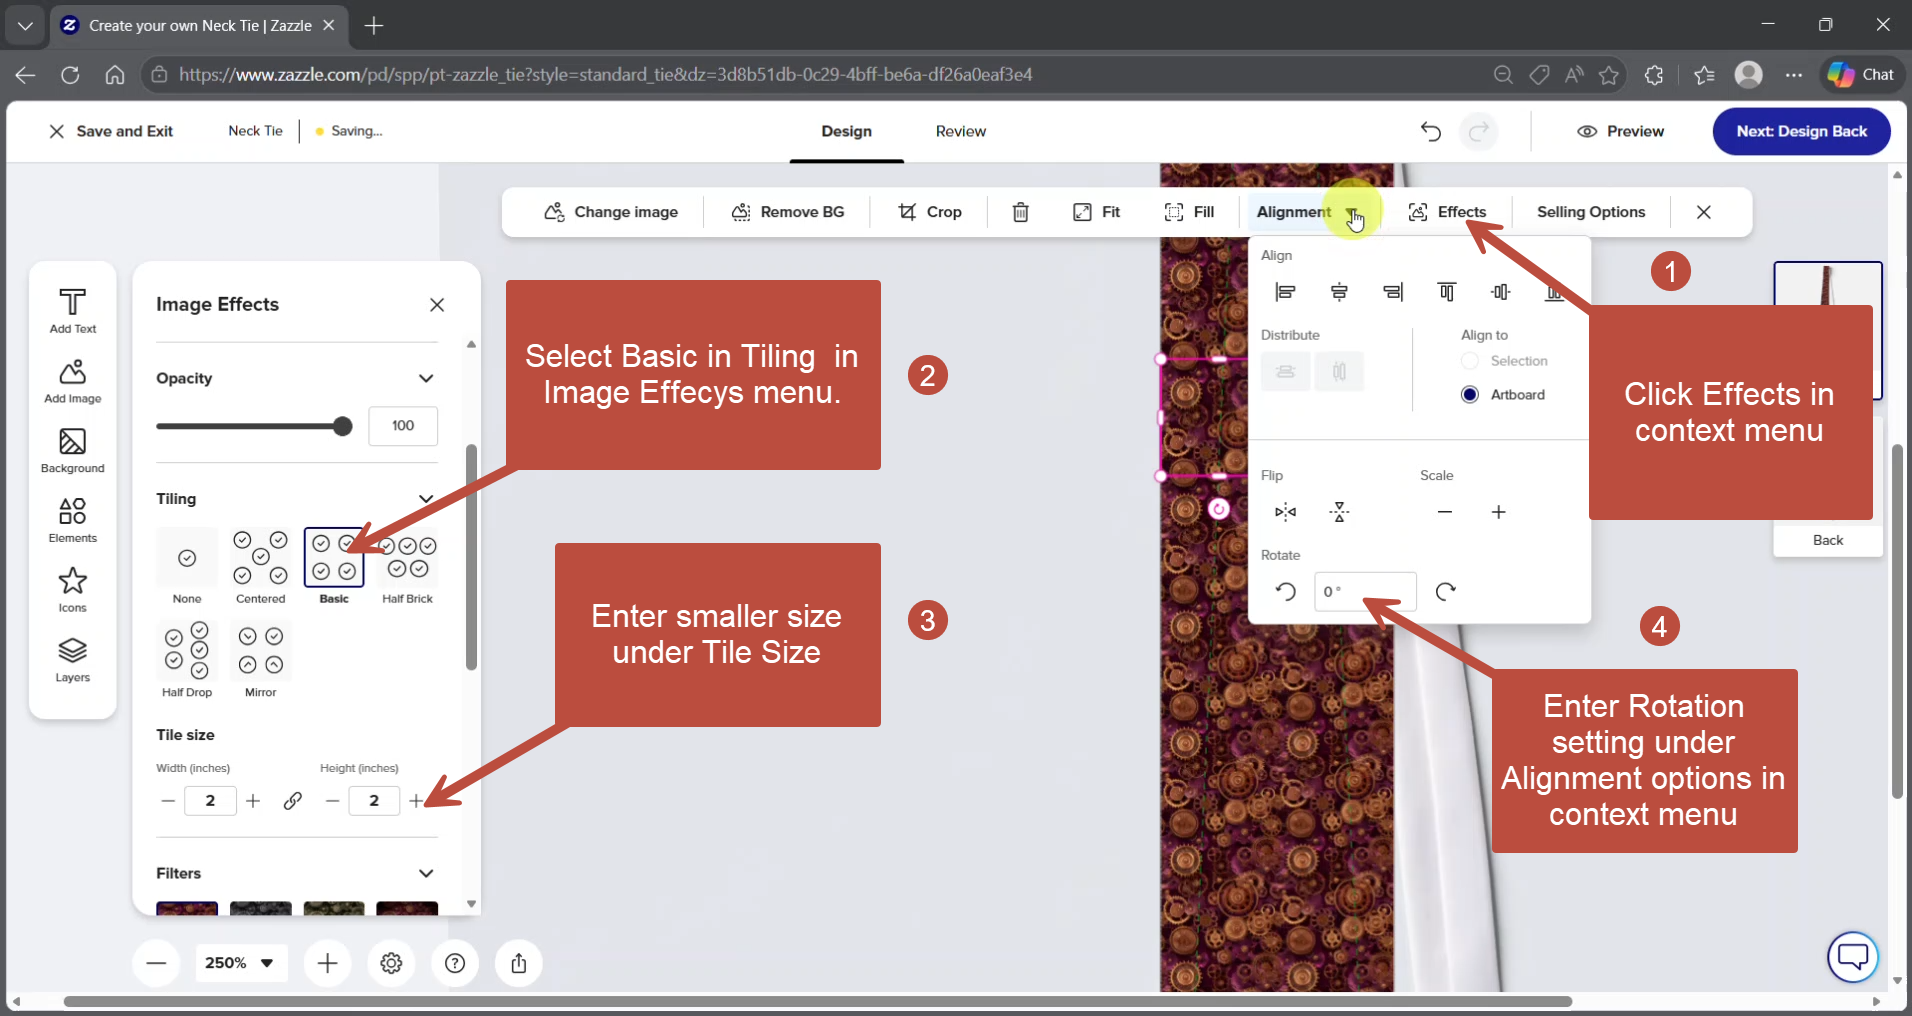
Step 6: Create a Repeating Pattern
To turn an uploaded image into a repeating background pattern:
- Upload your image tile and select it on the artboard
- Click Effects in the contextual toolbar — this activates the Image Effects panel in the left-side panel
- Under Tiling, select Basic
- Adjust Tile Size in the left panel to control how large the repeated element appears
- Use the rotation control in the contextual toolbar to adjust the angle of the pattern
Note: The Effects button only appears in the toolbar after you have selected an image on the artboard. If you don't see it, click on your image first.
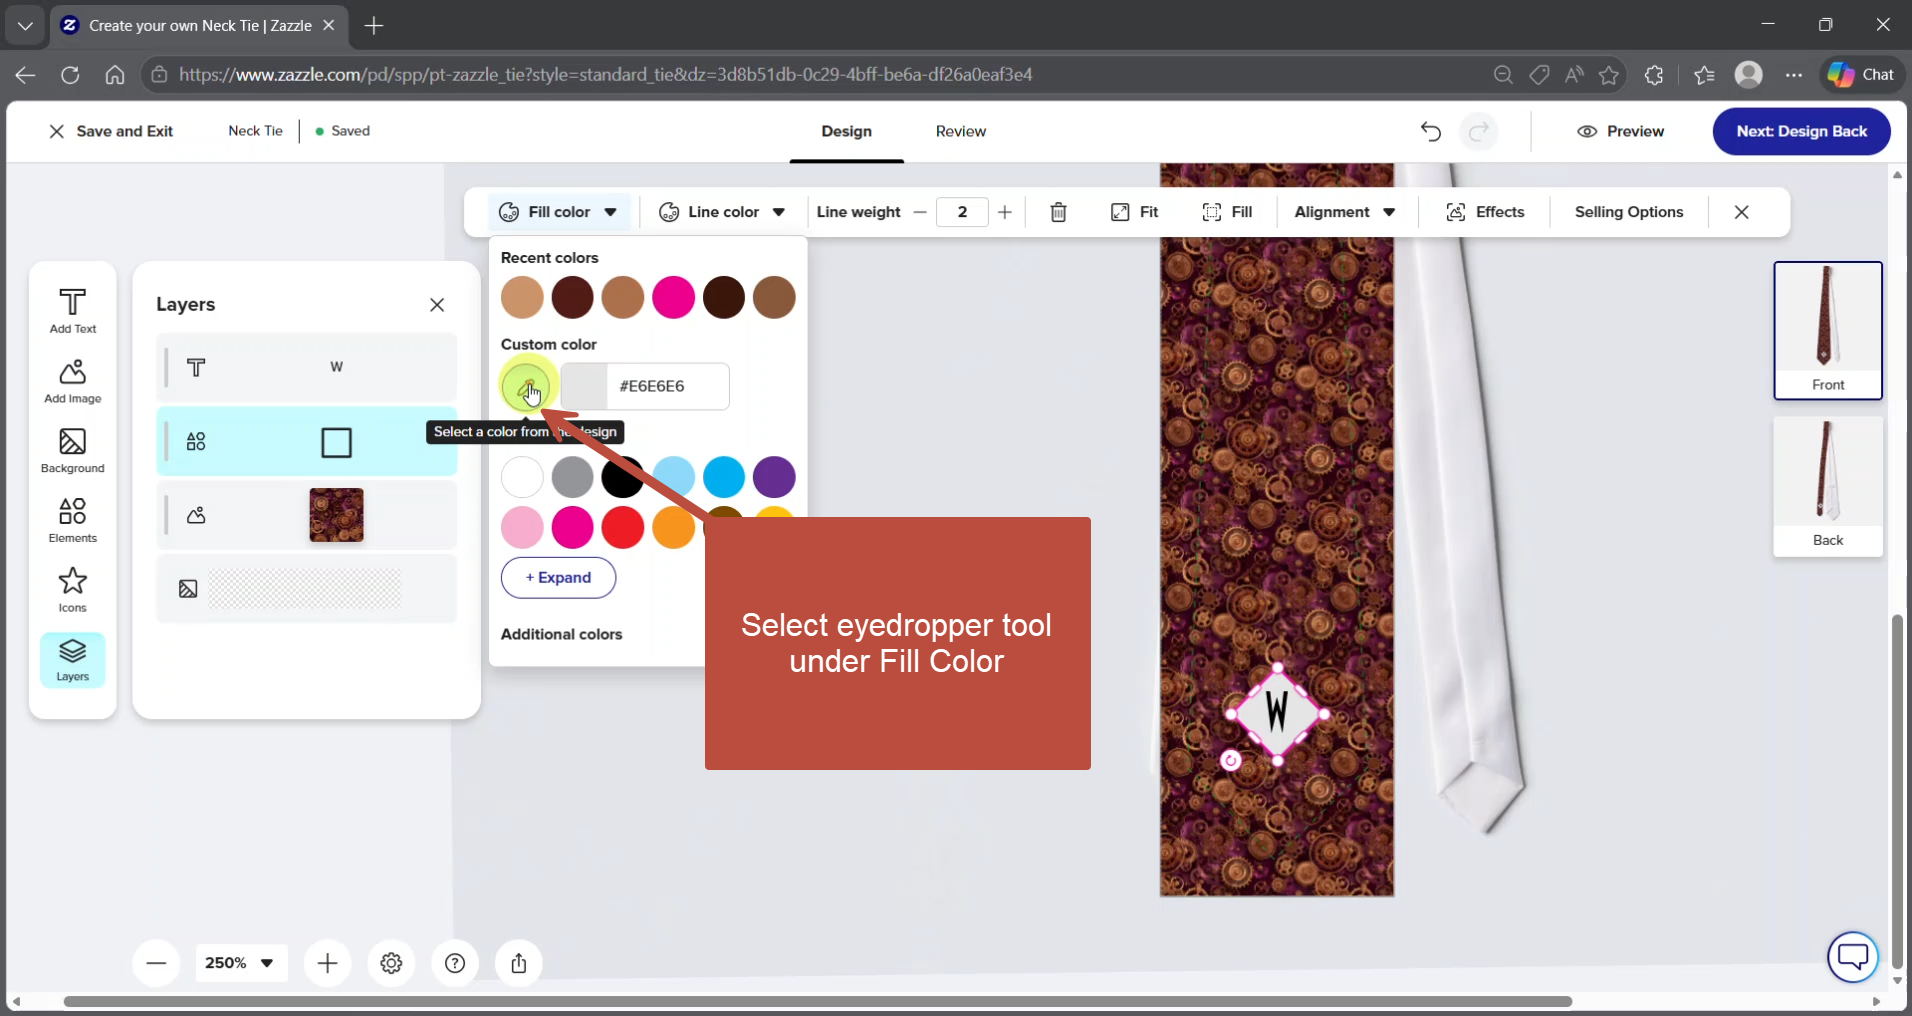
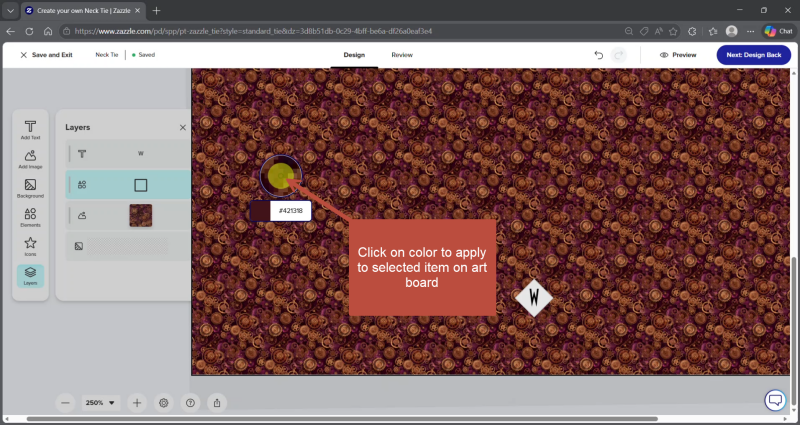
Step 7: Match Colors with the Eyedropper
To match text or element colors to your background pattern, select the element you want to color, then use the eyedropper tool to sample a color directly from the artboard. This keeps the design unified without guessing at hex codes.
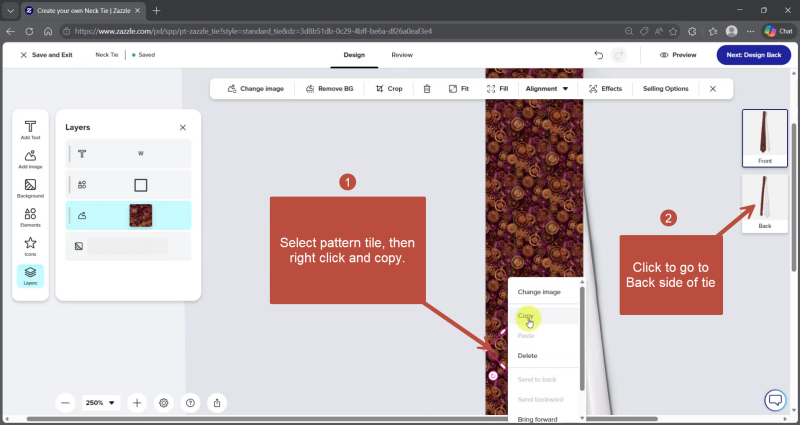
Step 8: Design the Back of the Tie
Neckties have a front and back artboard. To apply your pattern to the back:
- Copy the pattern tile from the front artboard
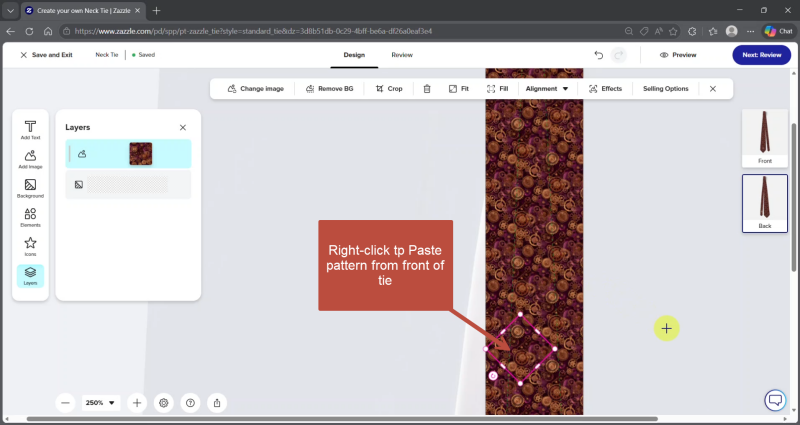
- Click the back artboard icon on the right side of the screen
- Paste the pattern tile onto the back artboard The front and back will then match.
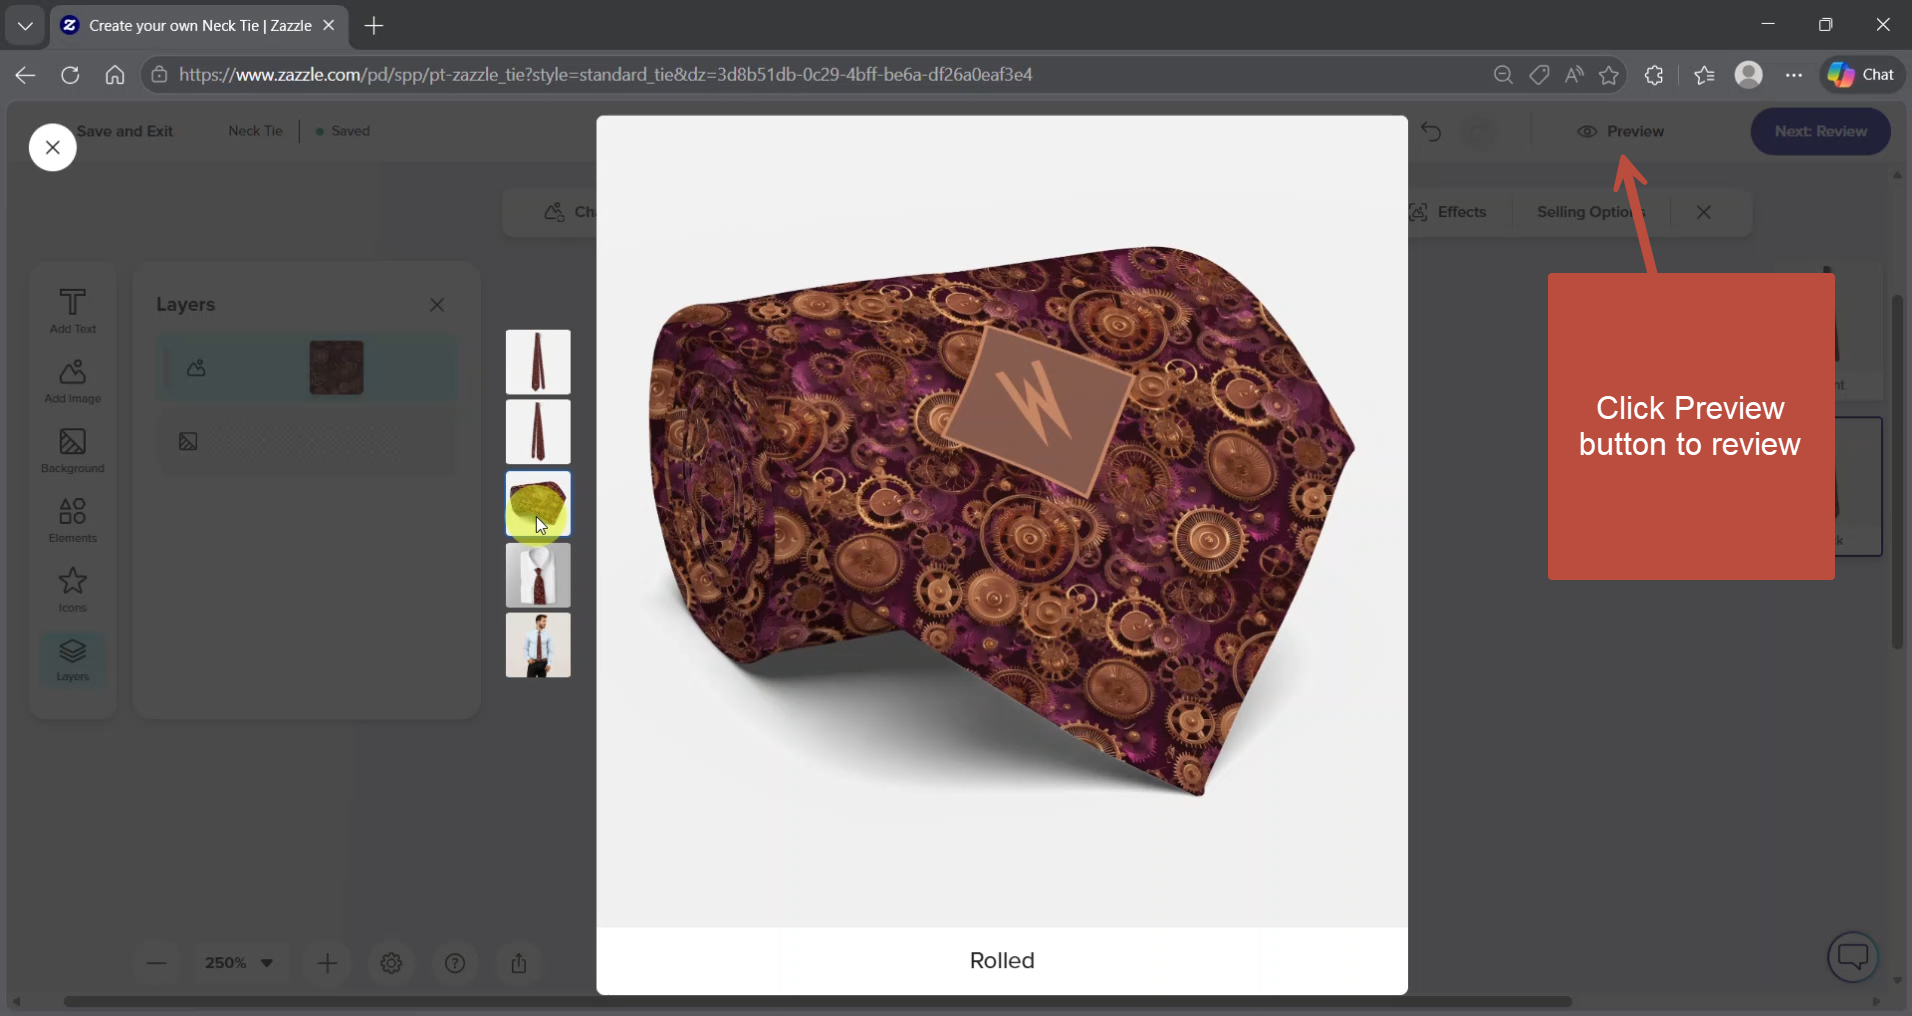
Step 9: Preview Your Design
Click the Preview button in the upper right corner of the screen to see a rendered version of your finished product. Check positioning, spacing, and color before finalizing.
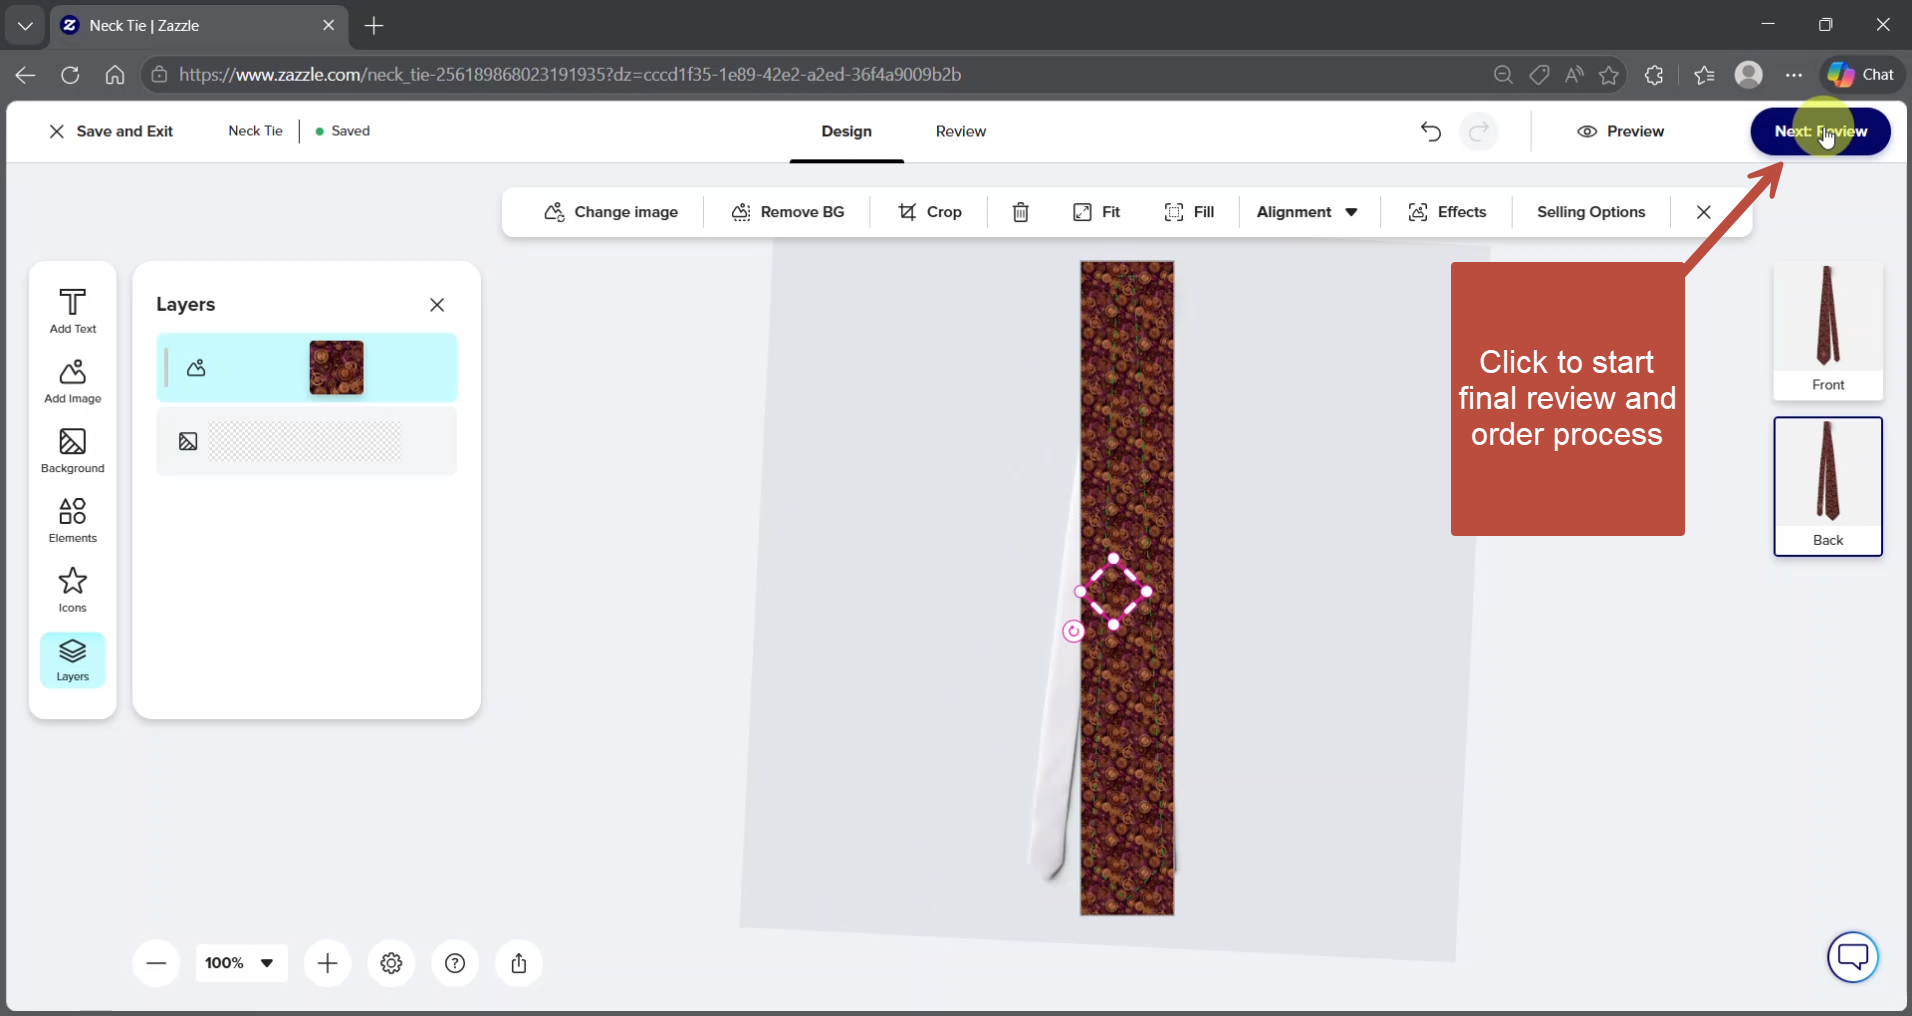
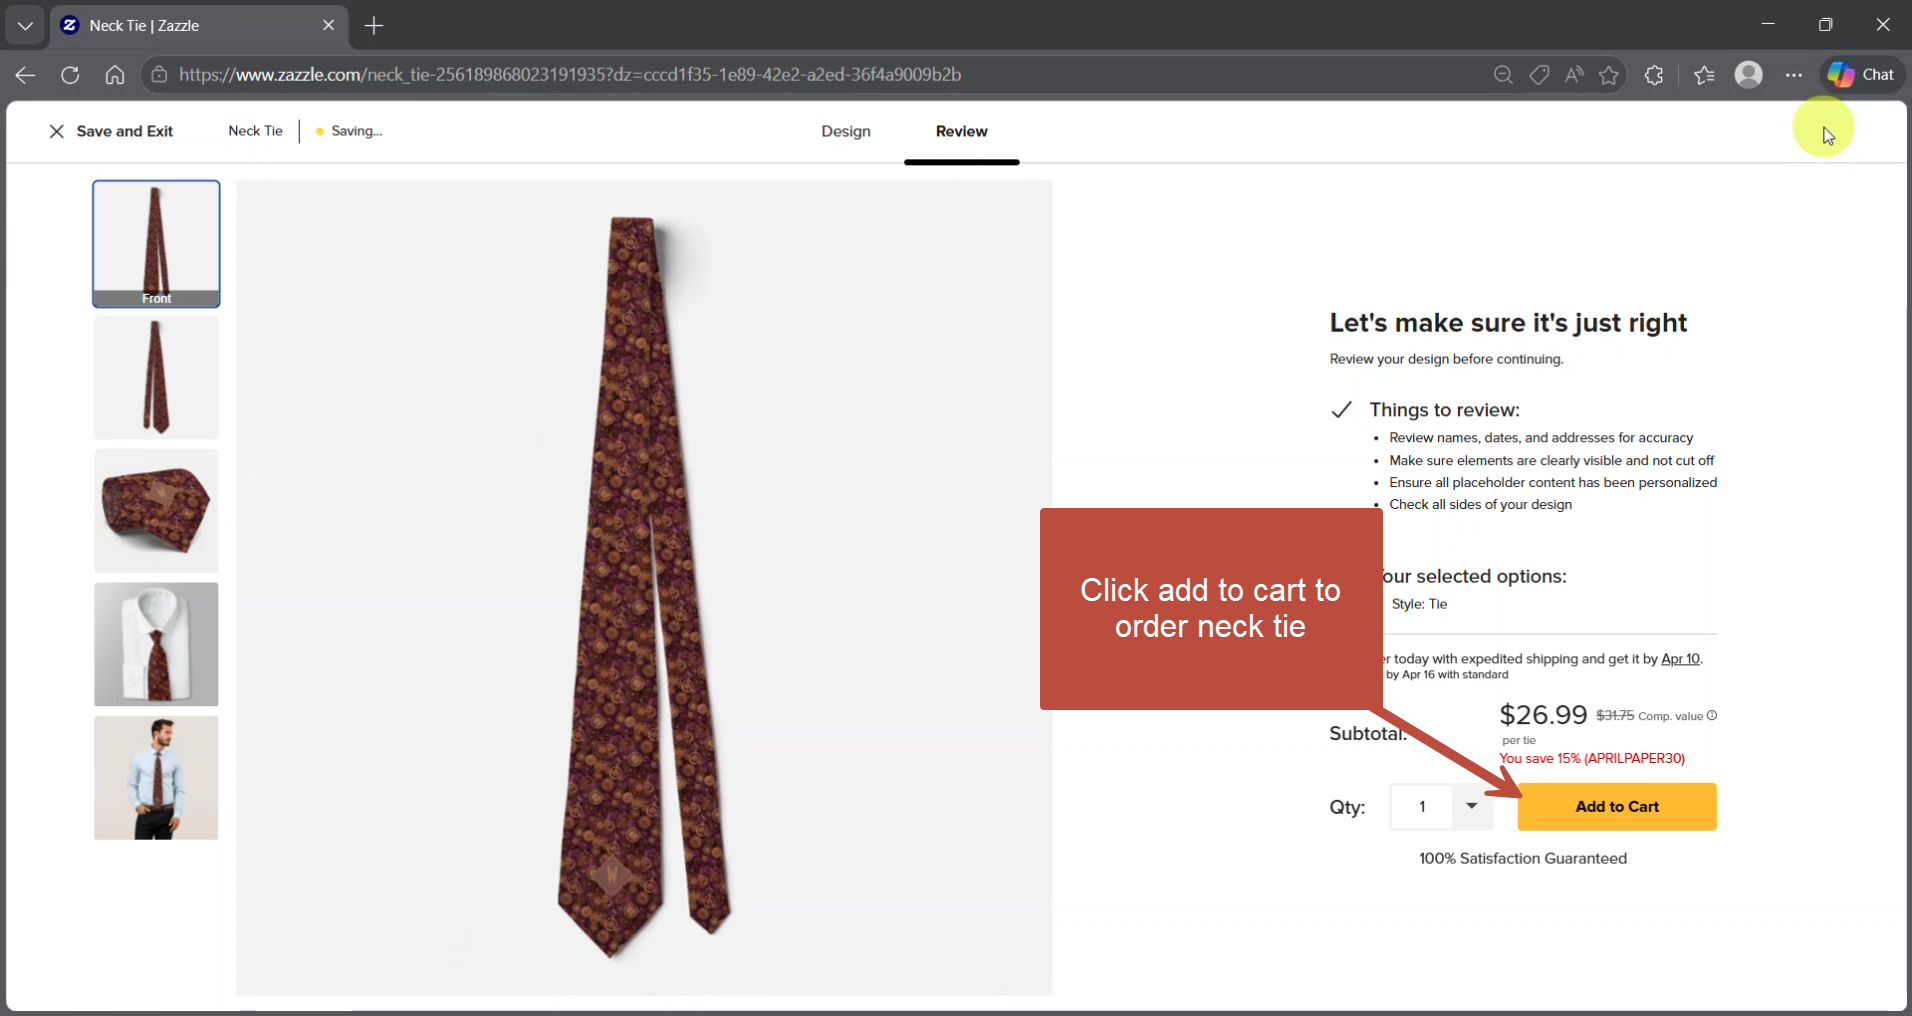
Step 10: Add to Cart
When you're satisfied with the design, click the blue Next button in the upper right corner. Zazzle will walk you through a final preview and confirmation before adding the item to your cart.
A Few Things Worth Knowing
- If the toolbar disappears, you've clicked off the artboard. Click on any element to bring it back.
- The Layers panel is especially useful for complex designs with multiple overlapping elements.
- Pattern seams are minimized when the tile is sized so the repeat isn't obvious at the edges — experiment with tile size until the pattern looks continuous.
Download the Cheat Sheet
Prefer a quick reference you can pull up while you work? This PDF cheat sheet covers the essential steps and key tool locations in a format you can use on your phone or print out.
Ready to Try It?
The best way to get comfortable with the new interface is to open a design and start clicking. Start with something simple — adjusting a monogram on one of the flag neckties or any other design in the collection is a good low-stakes first project.
For more tutorials, see:
How to Customize Your Flag Necktie Pattern — Size and Angle
How to Add a Monogram to a Flag Necktie
How to Transfer a Flag Pattern to Other Zazzle Products